How to Set up a Schedule for an In-person Event in Zuddl
Last updated: September 3, 2025
This article explains how you can create a session and also how you can search for one on your Zuddl dashboard.
Add a session
To create a schedule you need to add sessions. To add a session
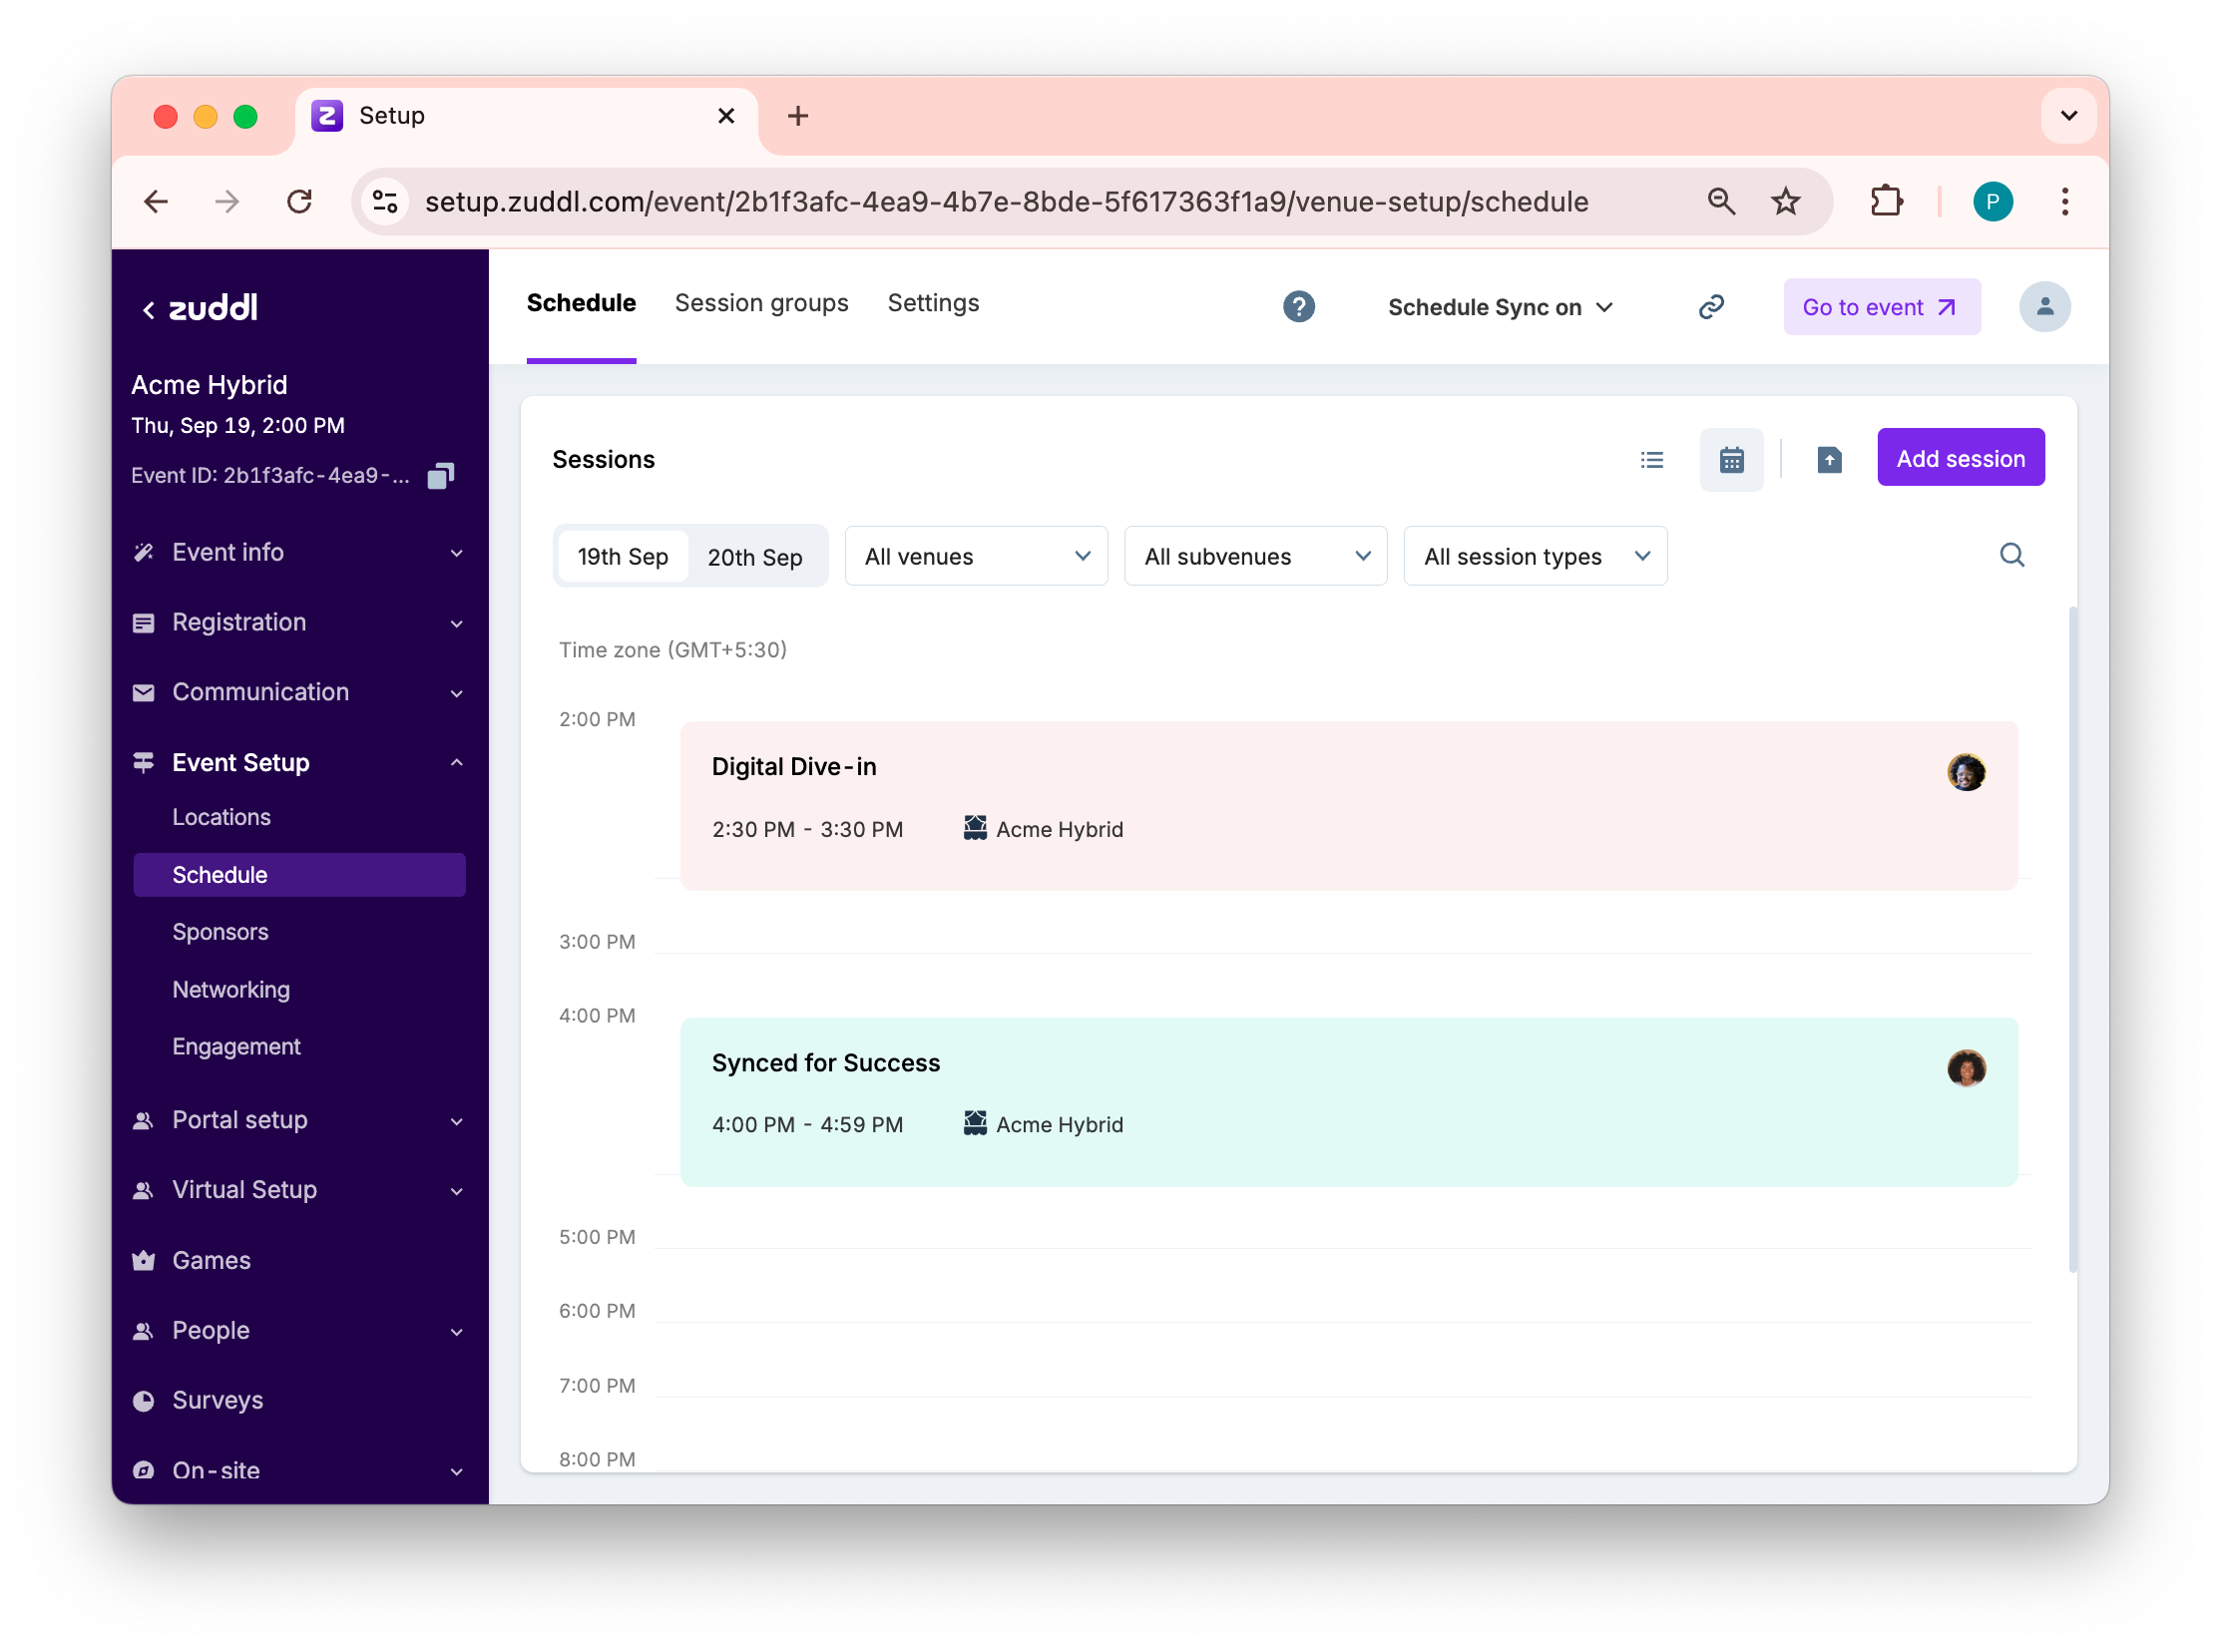
Go to Event Setup > Schedule. This takes you to a page where the entire schedule is visually represented date-wise, over a timeline.
Click on the Add session button to start creating a session or tap on a particular time window on the timeline to create a session for that time.

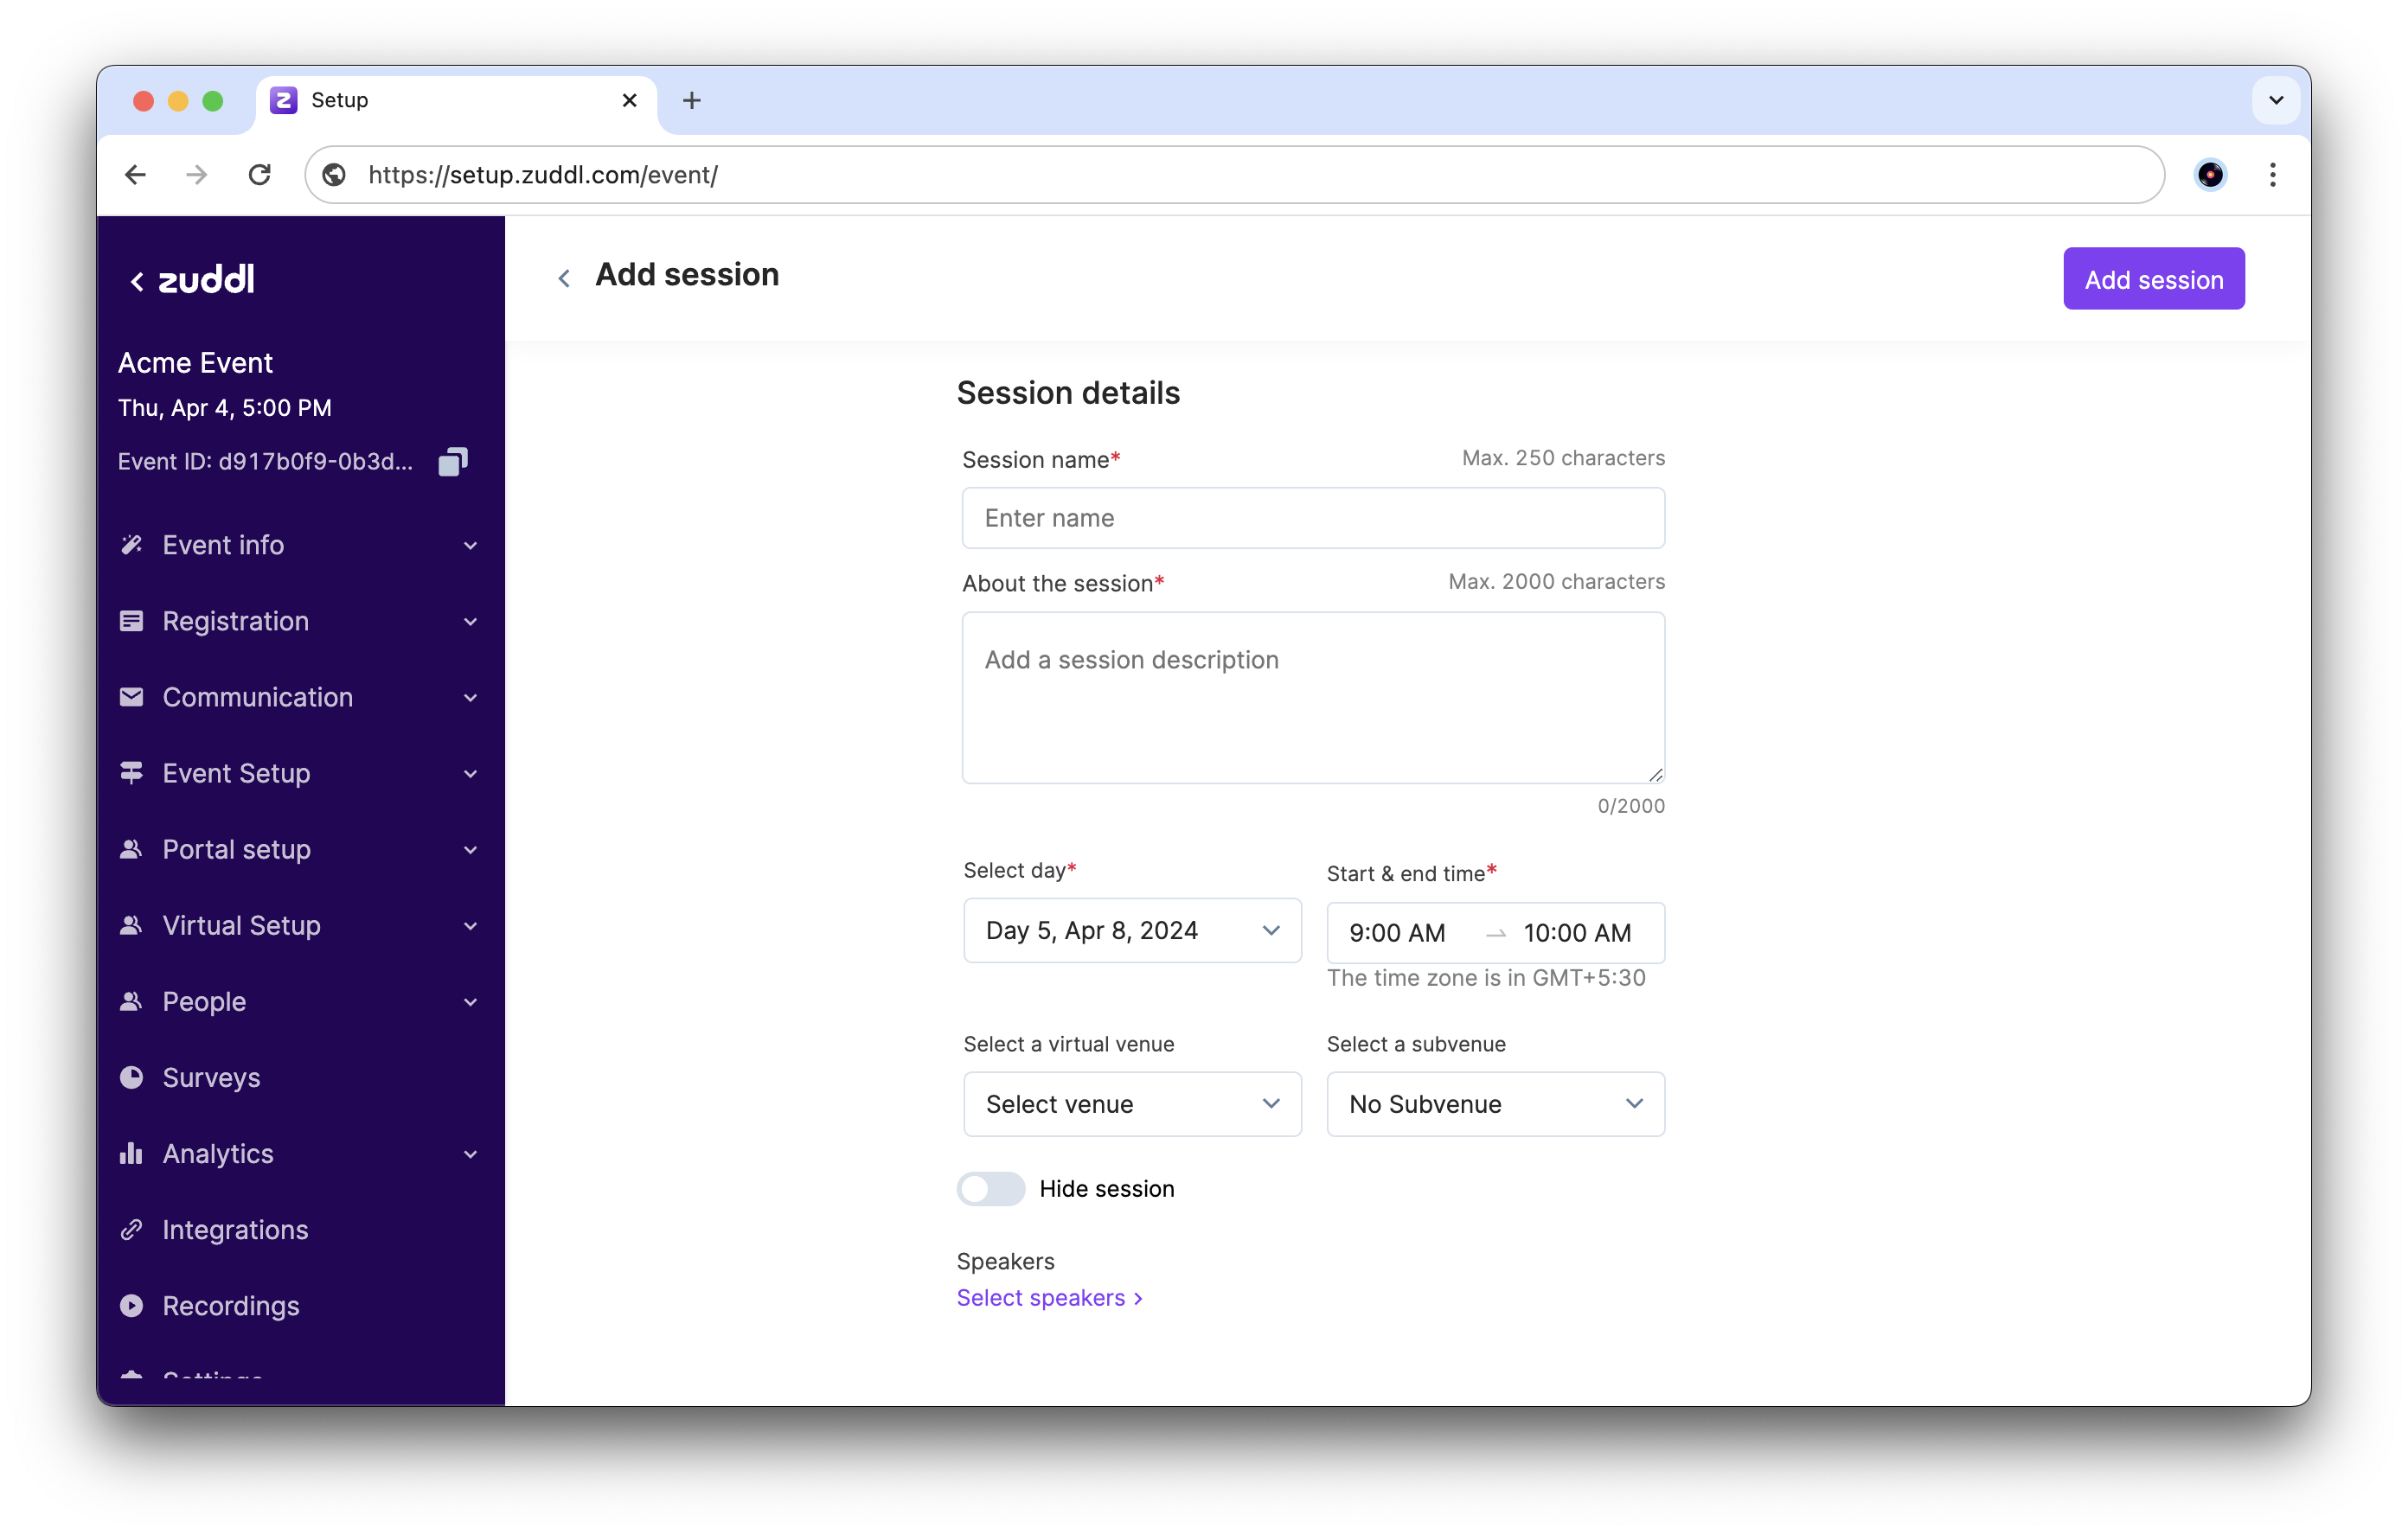
Enter a Session name (of up to 250 characters).
In the About the session text field, add a session description (of up to 2000 characters). The session description appears in the Schedule venue on the live event side.
On the Select day field, select the date-day for the session.
Select a time range in the Start & end time and click Ok.
The event timezone is shown to the registrants during registrations.
Select a virtual venue from the dropdown. A venue is a place in an event where sessions take place.
If you have selected Stage as a venue, an additional field Speakers is shown.
Select a subvenue based on the selected venue. A subvenue is a particular area within a venue for example, within an expo venue, booths are subvenue. The Subvenue options are populated according to the venue selection.
Optional. If you wish to hide the segment from the event participants, select the Hide session checkbox.
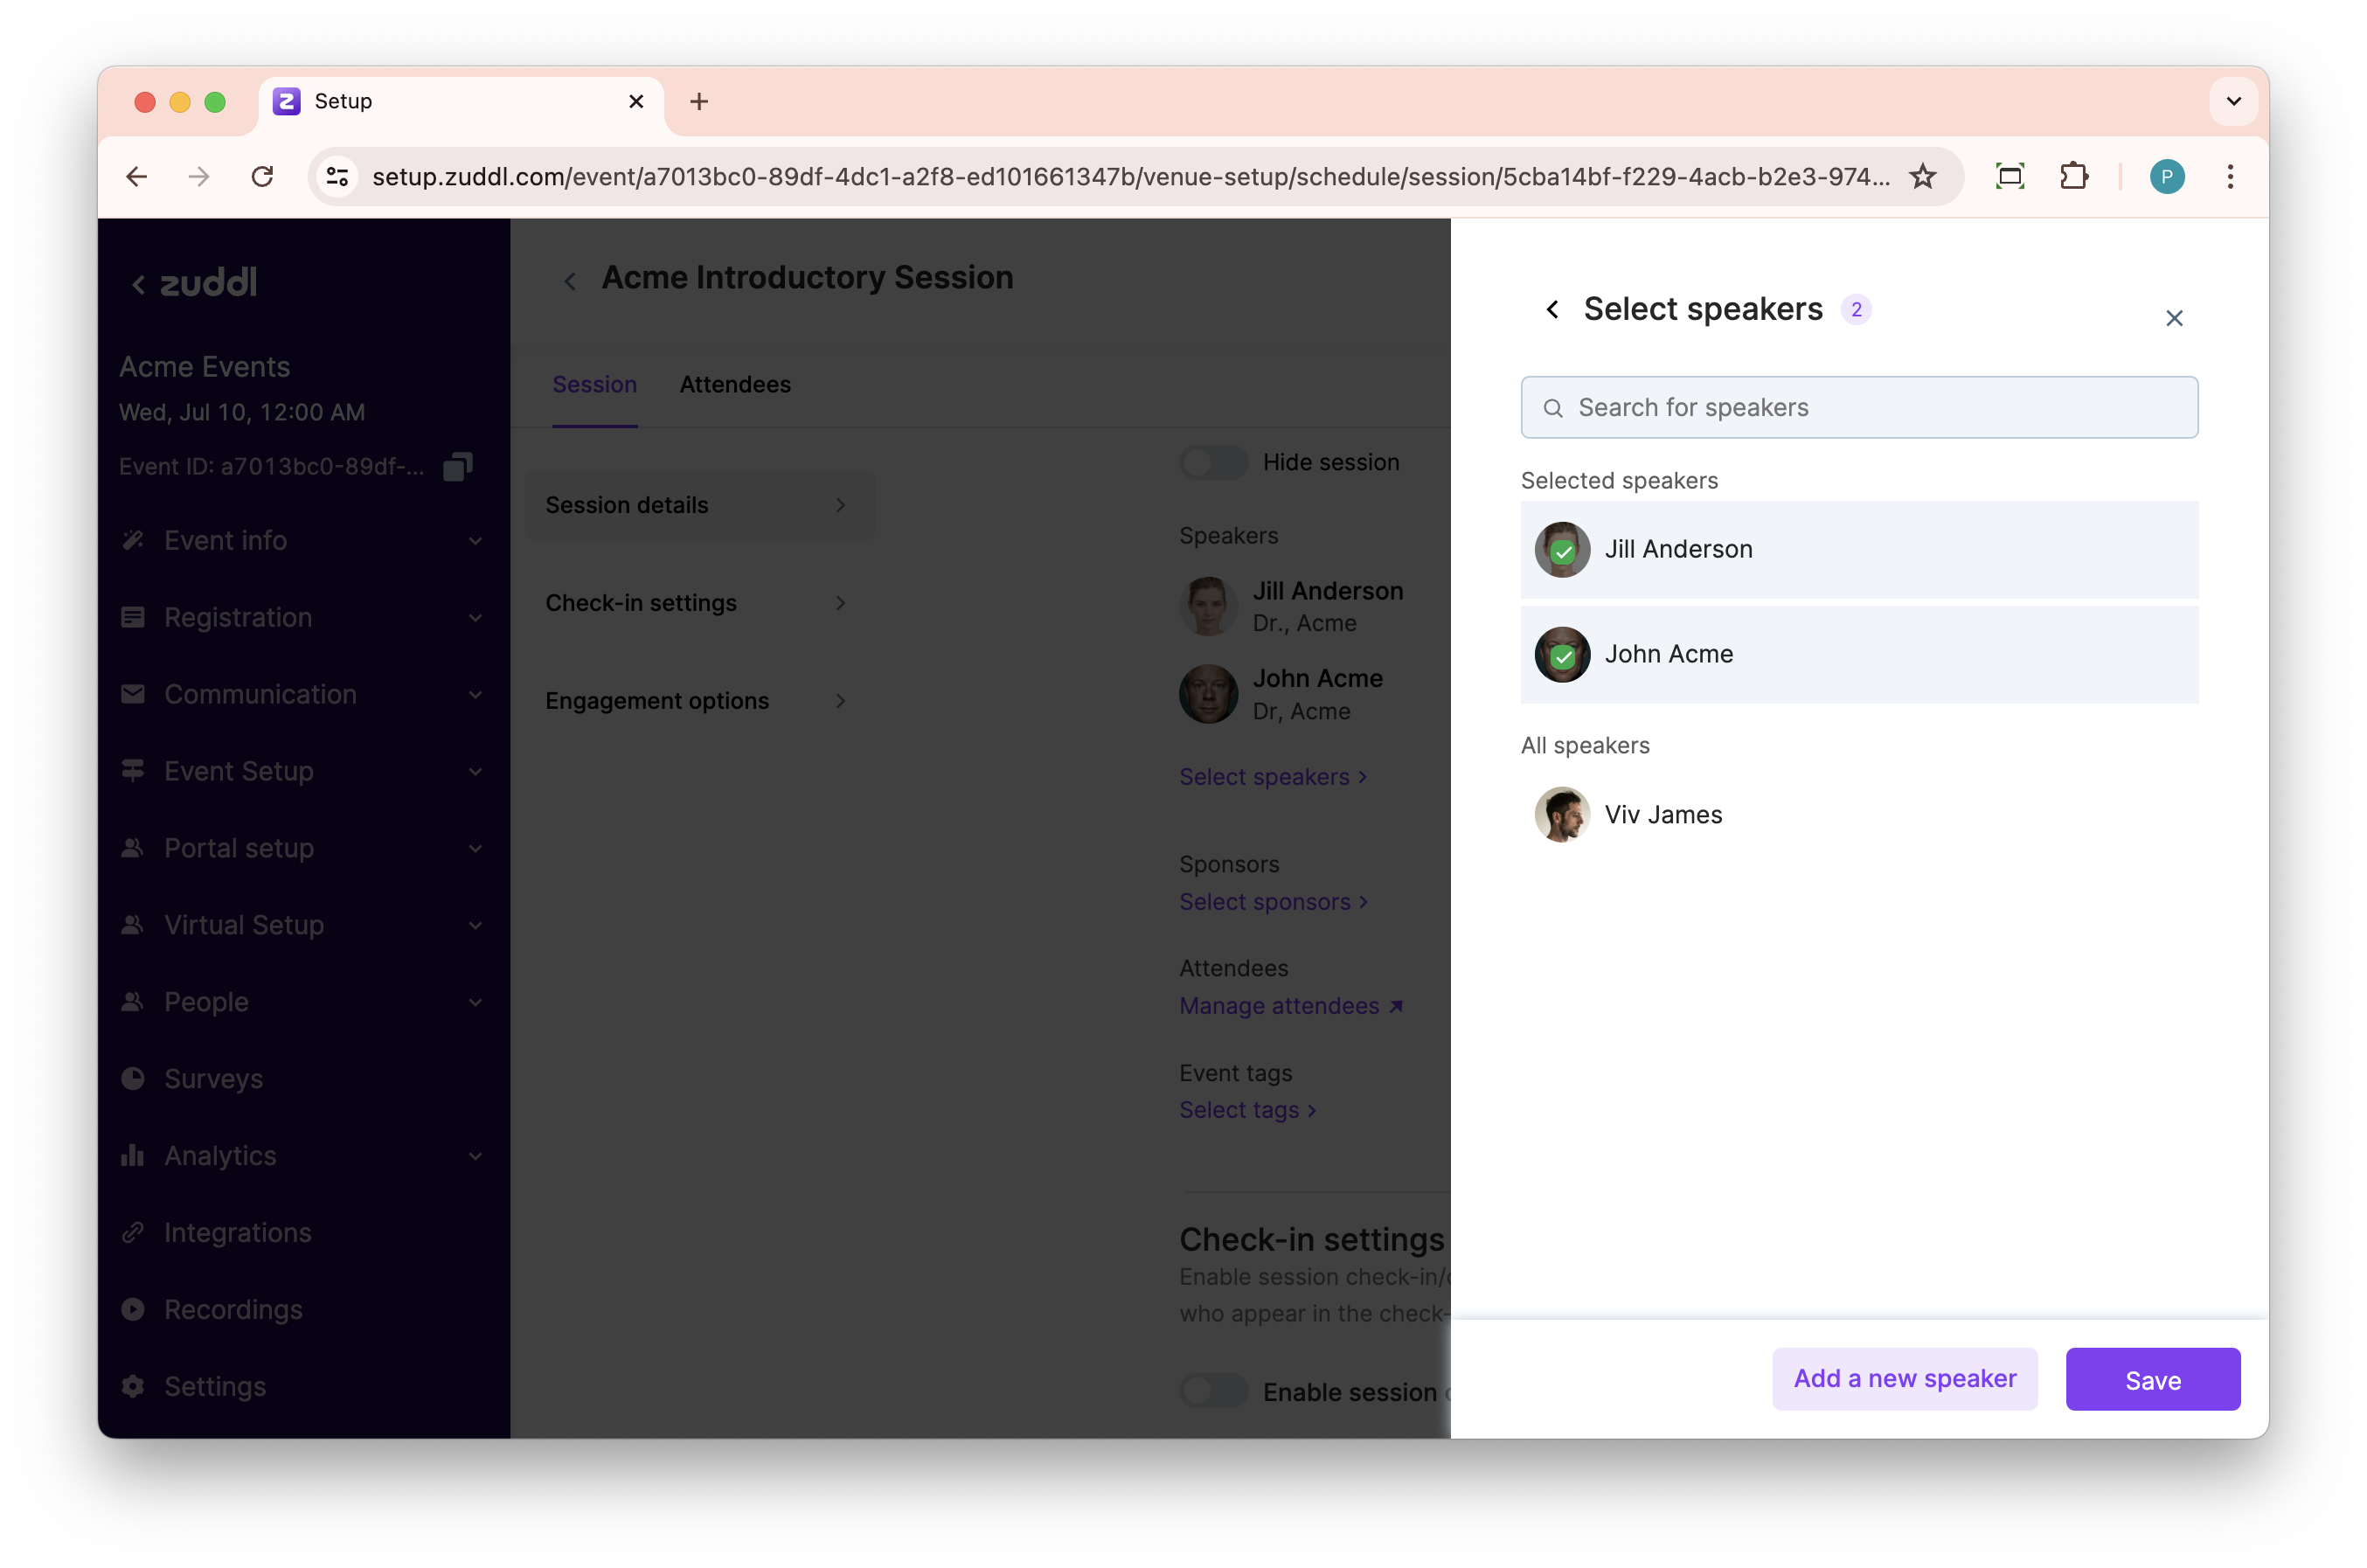
Click on the Select Speakers link, search and select the speakers from the list. You can also add new speakers by clicking Add a speaker button. Learn how to add a speaker.
Click Add session.
The created session appears as a card on the calendar view on the session listing page.
Manage session
Once you've created a session, you can configure it further with more settings. The session settings are divided into 3 categories namely; Session details, Check-in settings, and Engagement options.
Session details
Under Session details, you do the make following setting changes
Under Session location, select an added location from the dropdown. Learn how to add a location.
Under Session capacity, enter the maximum number of attendees that can join or access the session.
Click the Select speakers link to search for a speaker and select from the list. You can also click the Add a new speaker button to add a new speaker. To remove a speaker, simply clear the checkbox.
Under Sponsors, click the Select sponsors link to search for a sponsor and select from the list of added sponsors. You can also click the Add a new sponsor button to add a new sponsor. To remove a speaker, simply clear the checkbox.
|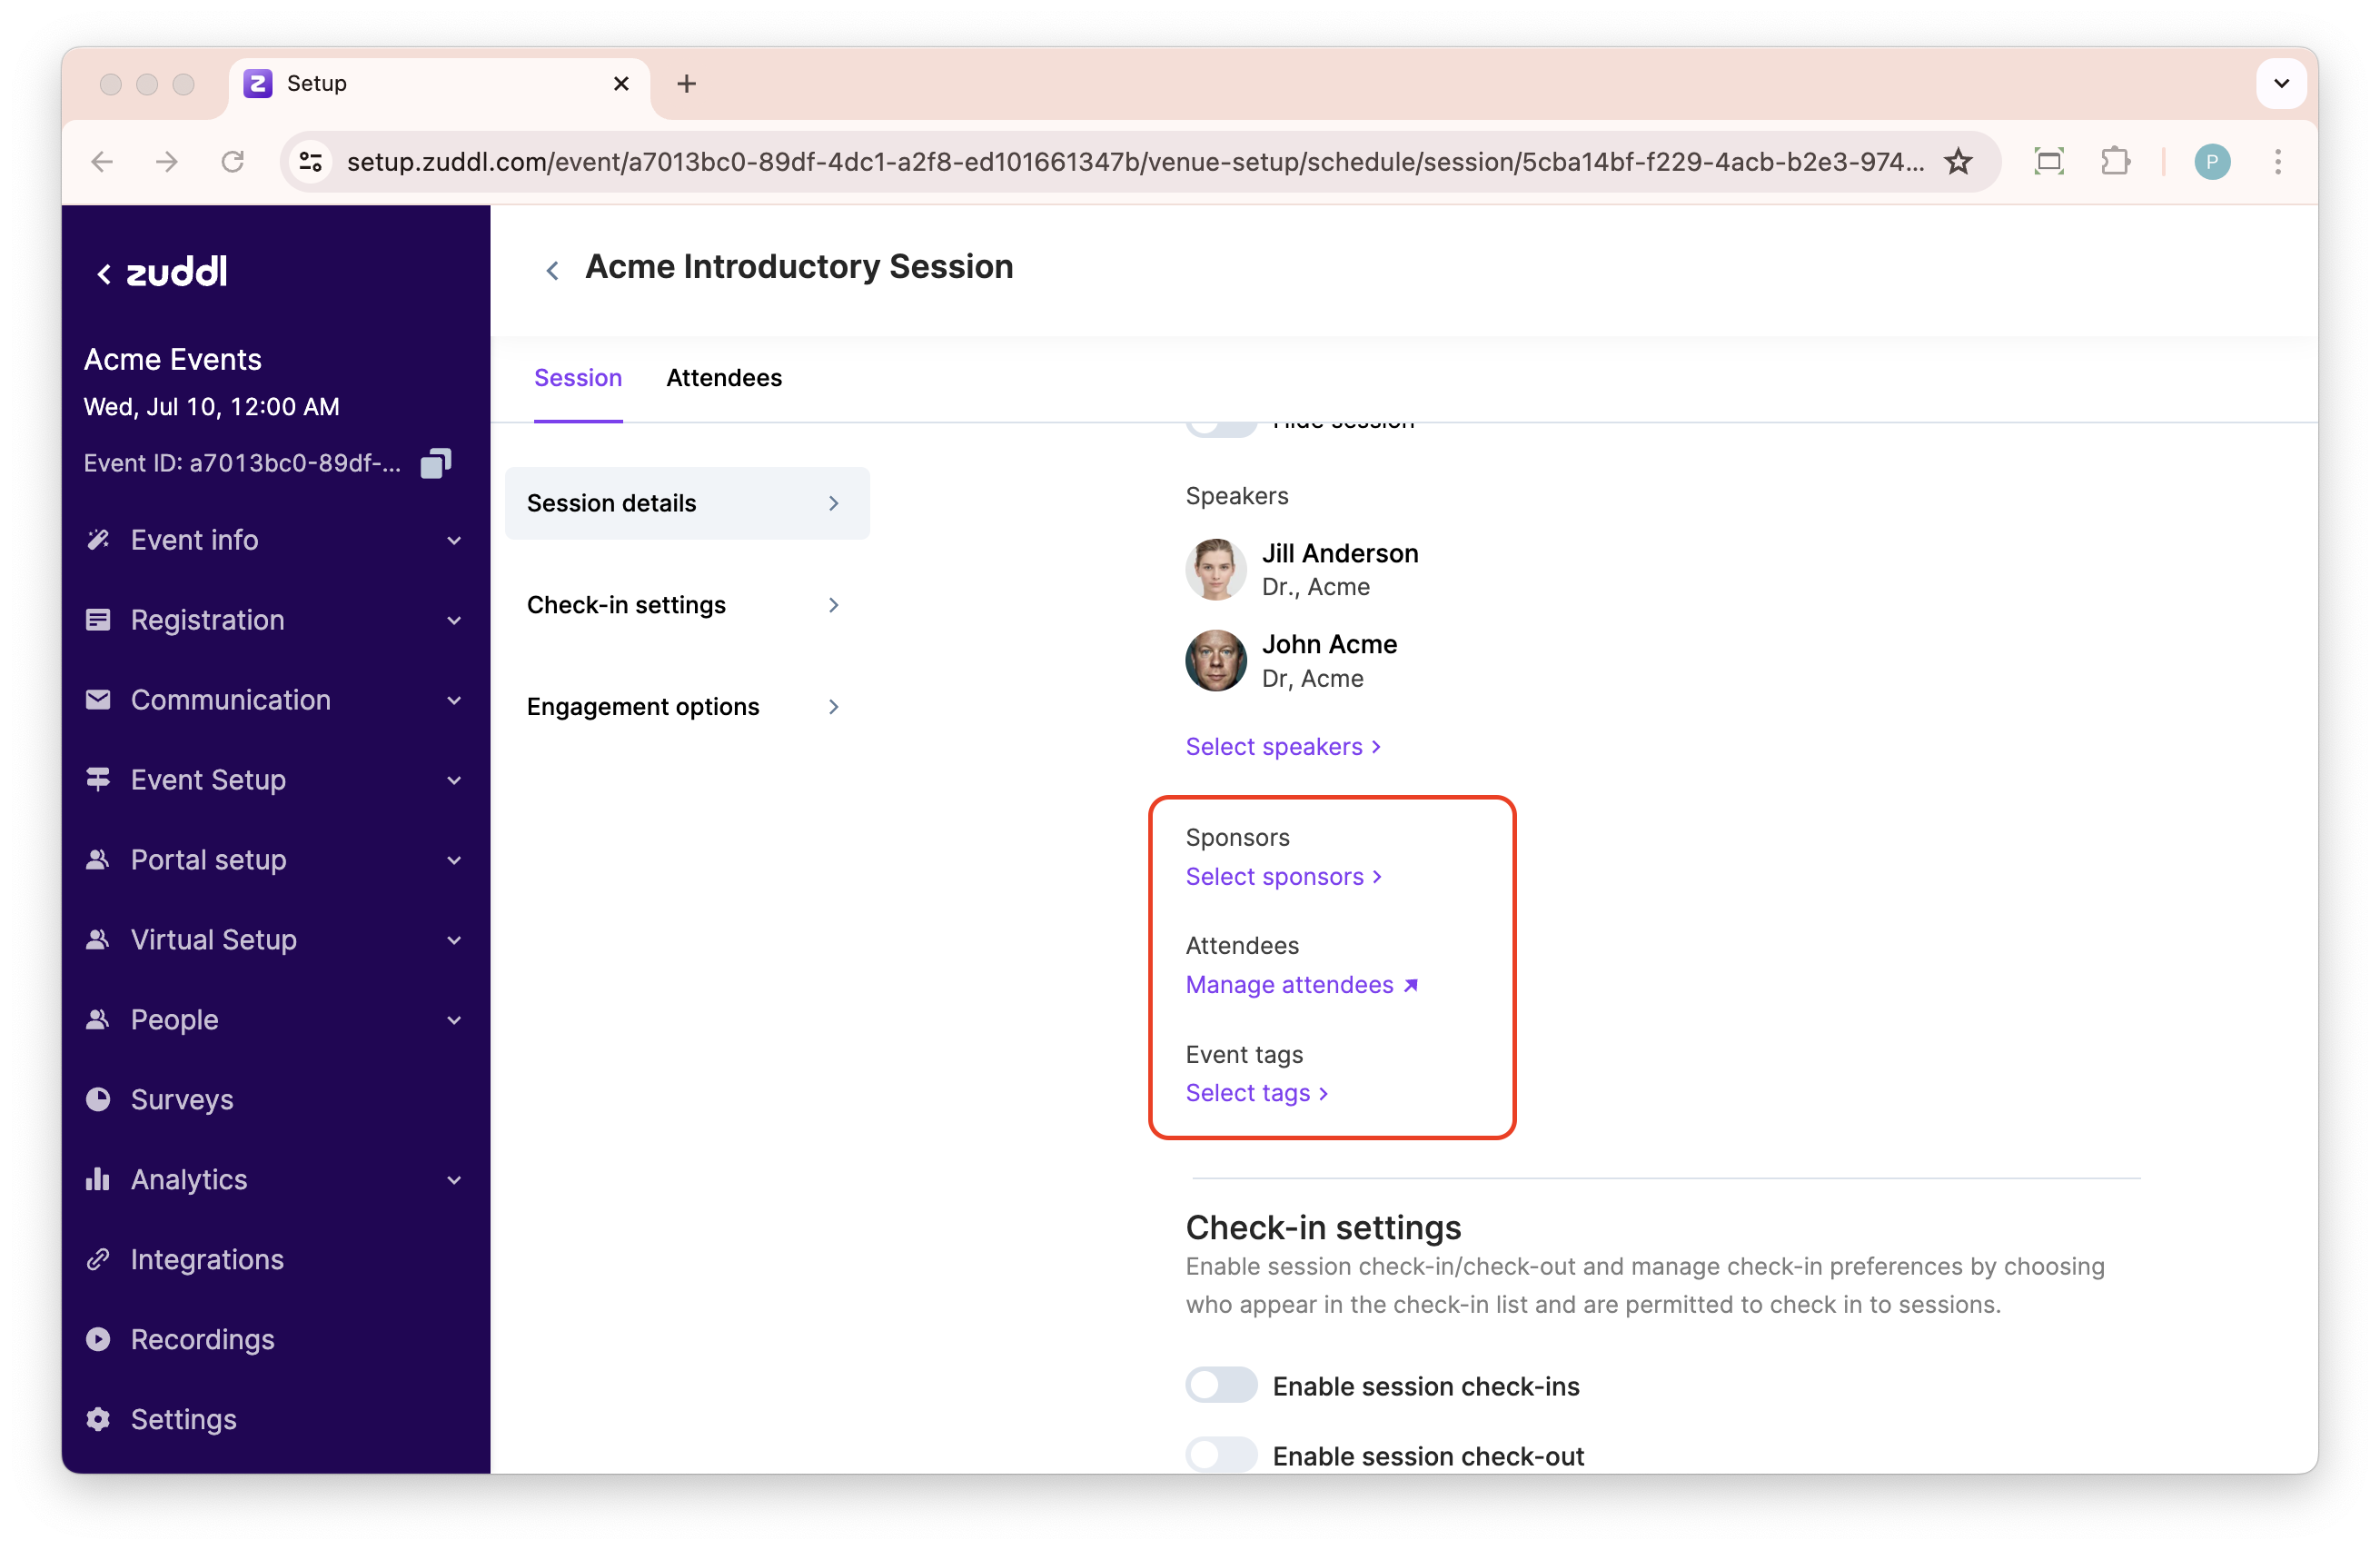
Under Attendees section, click Manage attendees, to get started with adding attendees to this session. There are two ways in which you can add attendees,
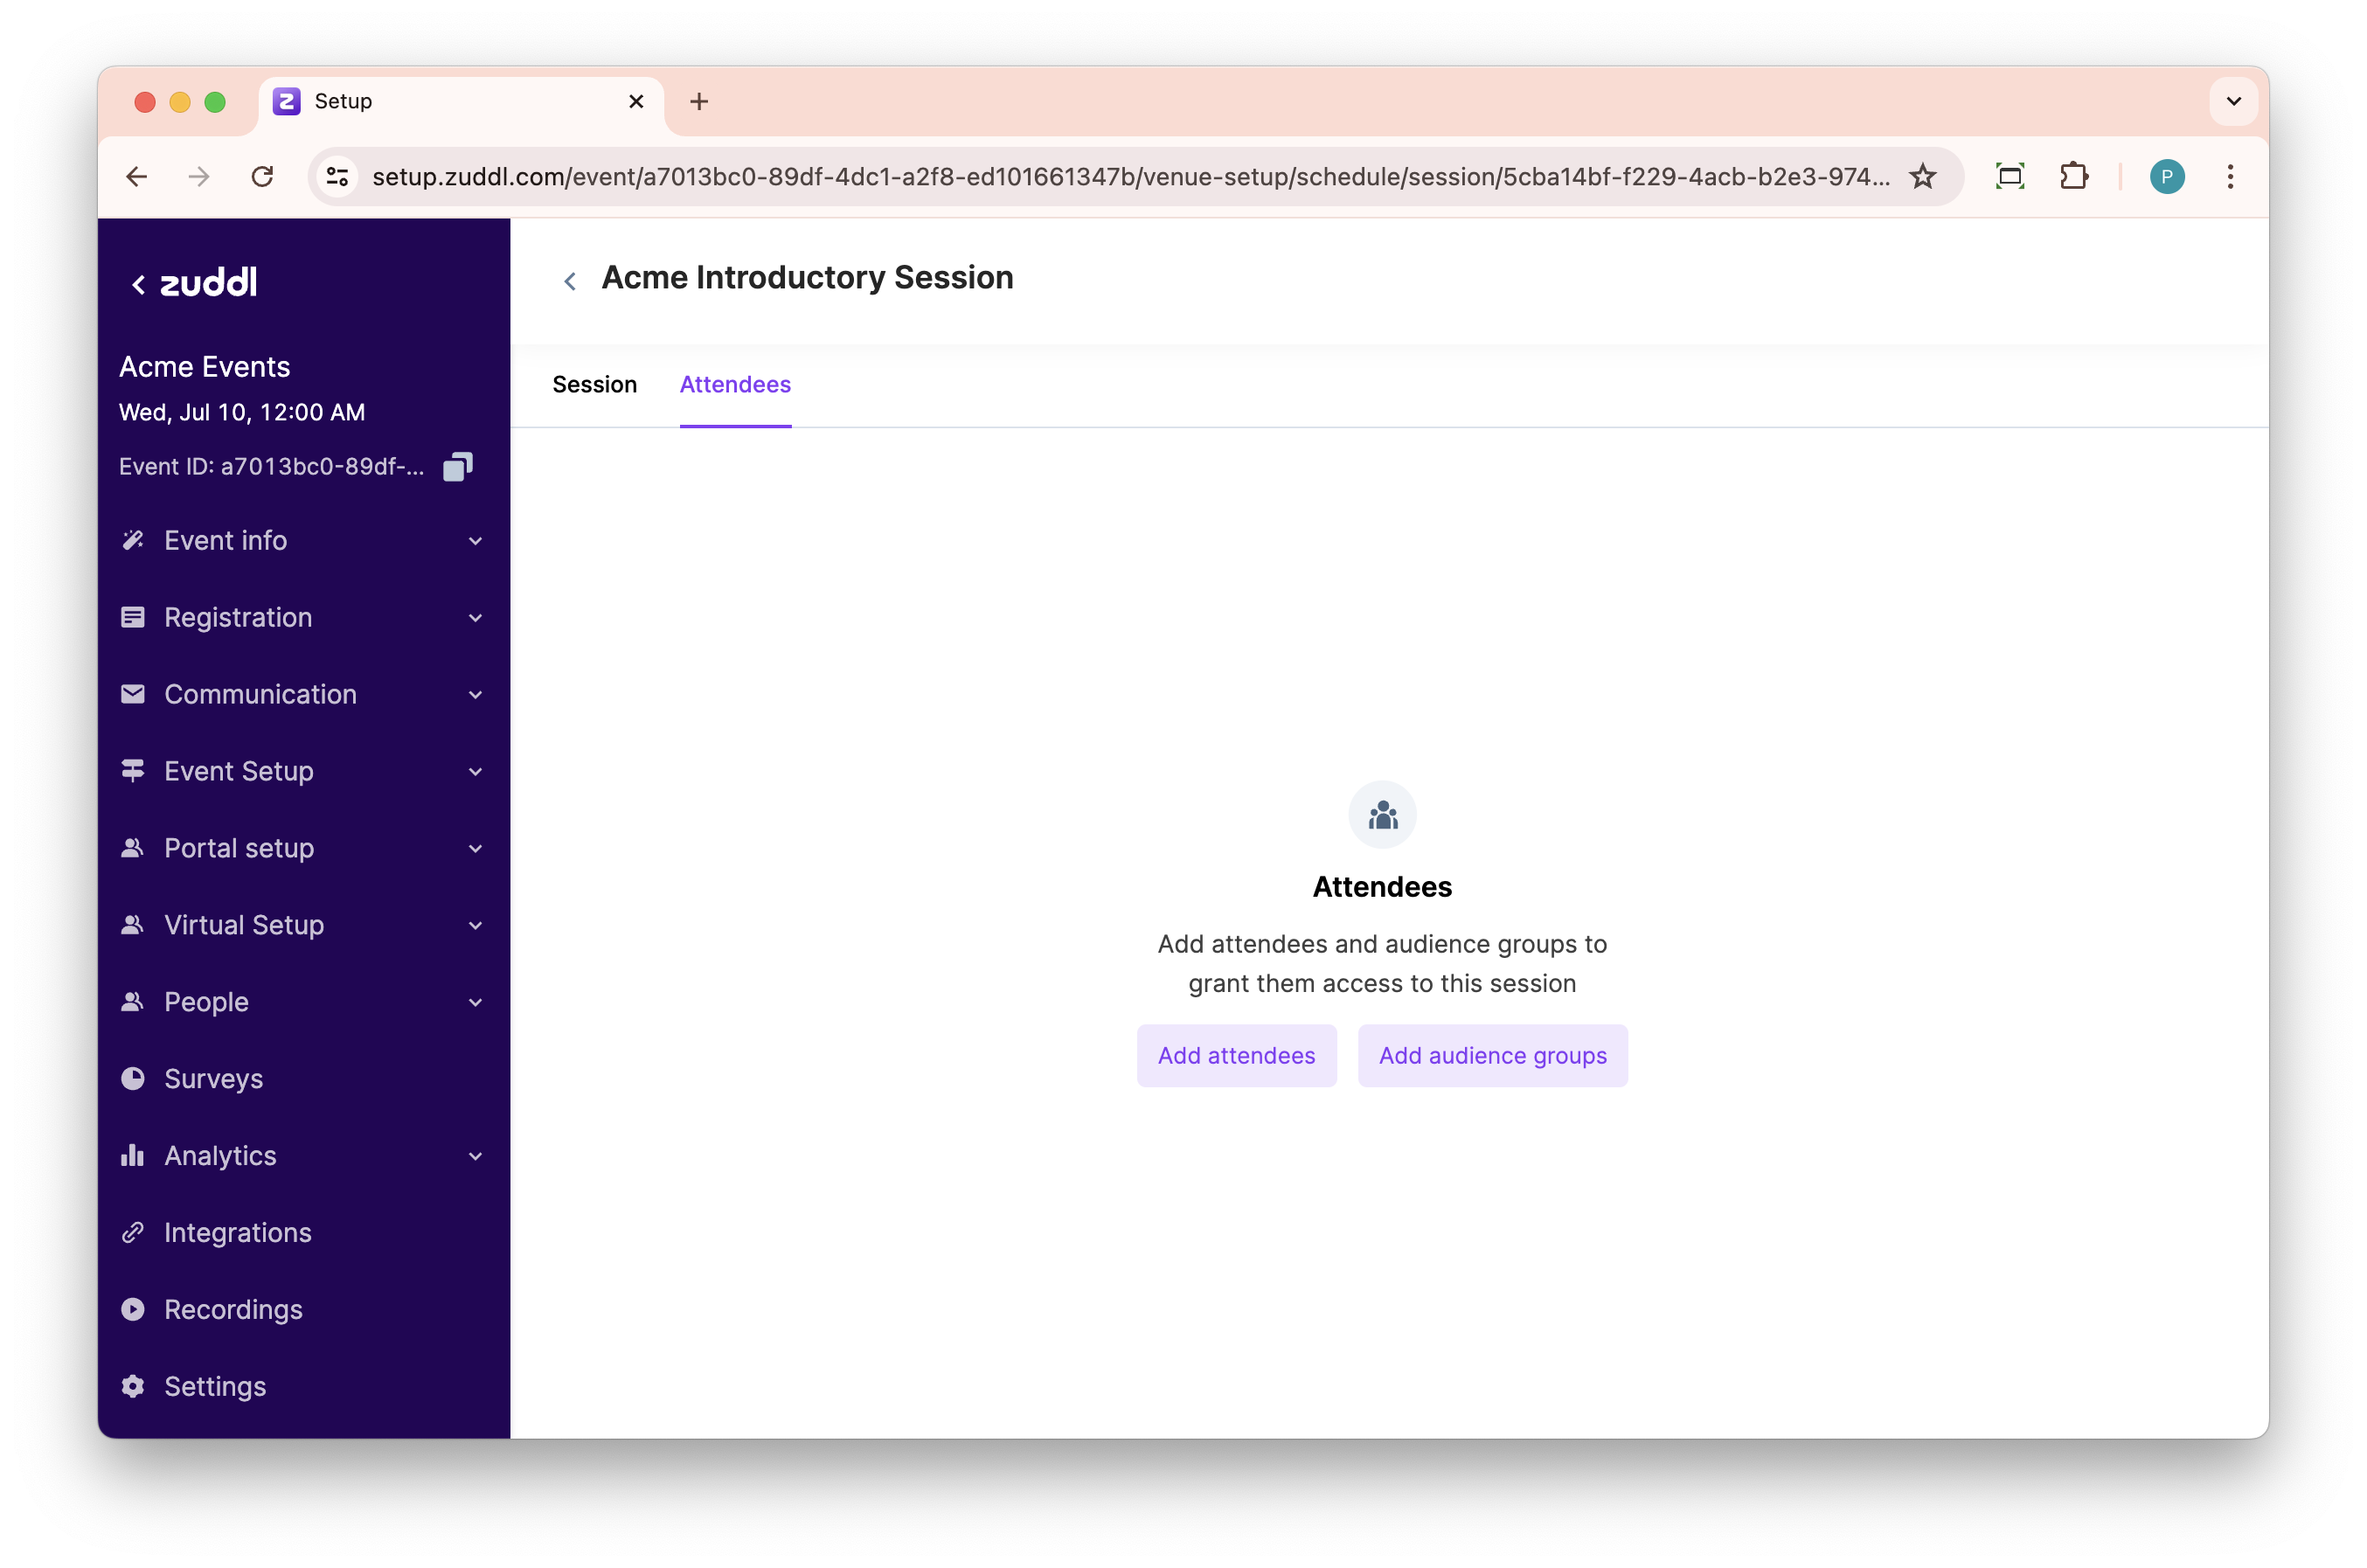
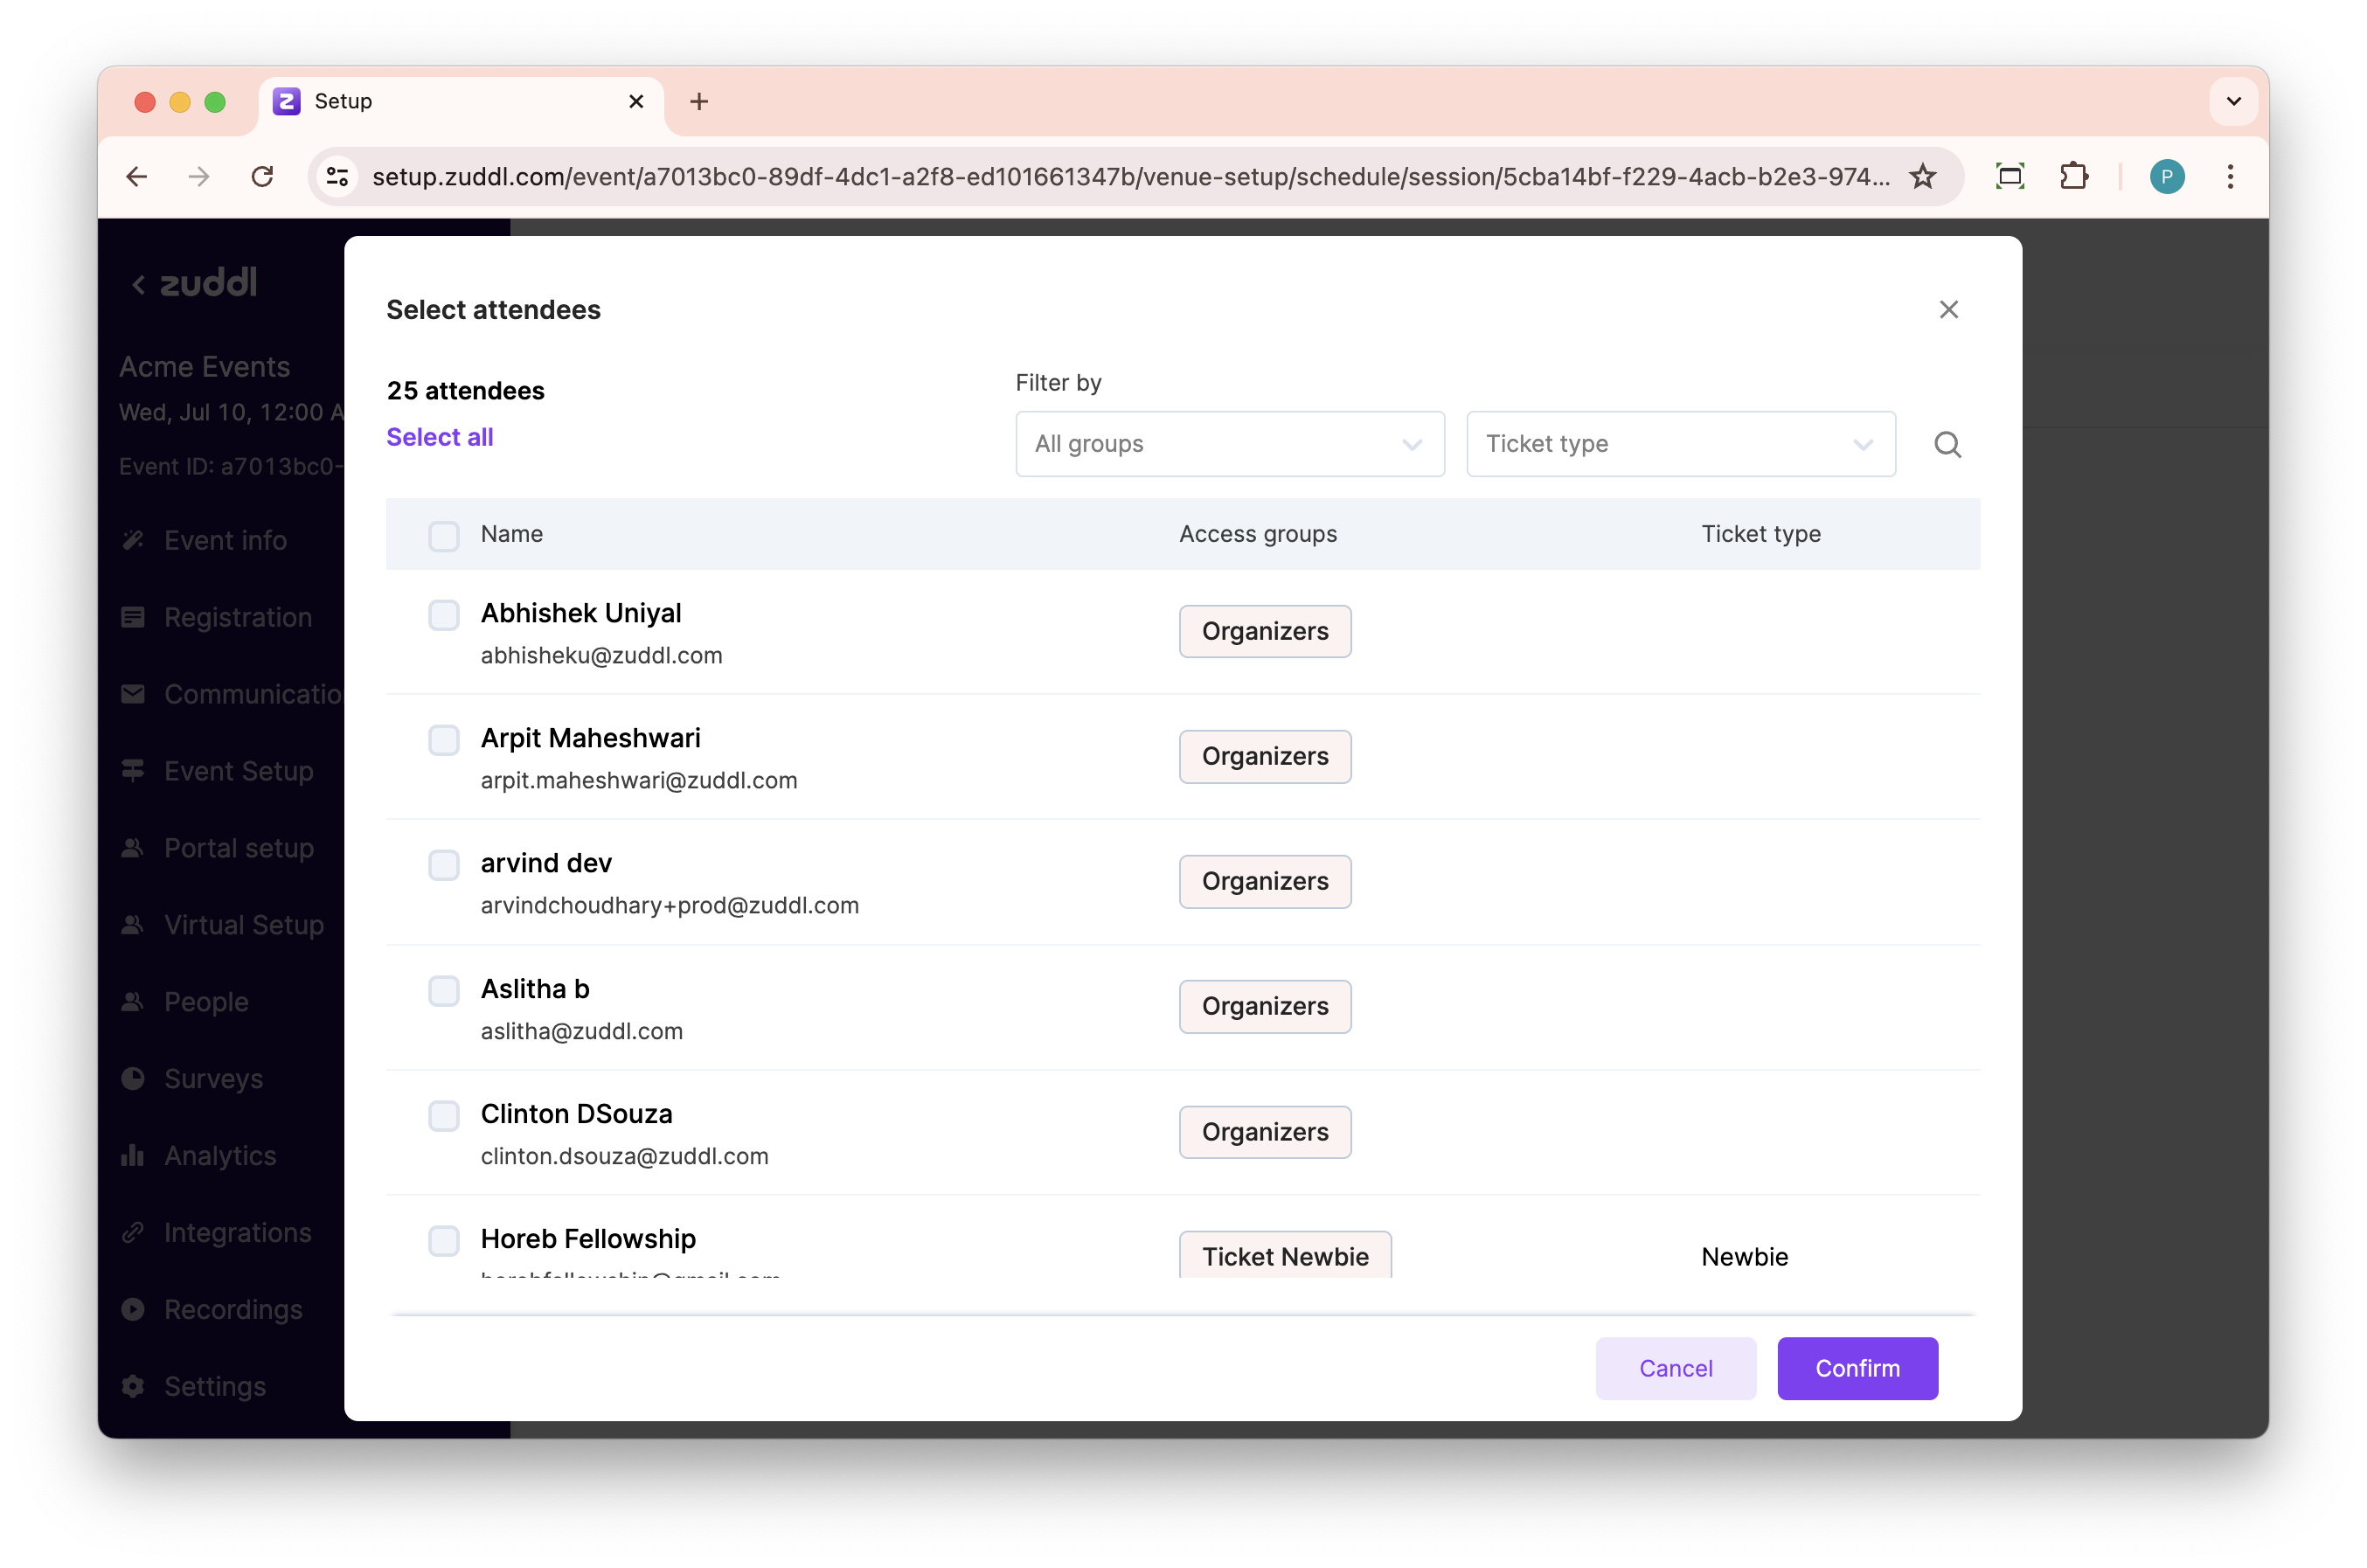
Click on Add attendees button to select attendees by their name, email address, Audience group, or ticket type.
Click Add audience groups to select an audience group from the list to which access to this session will be granted.
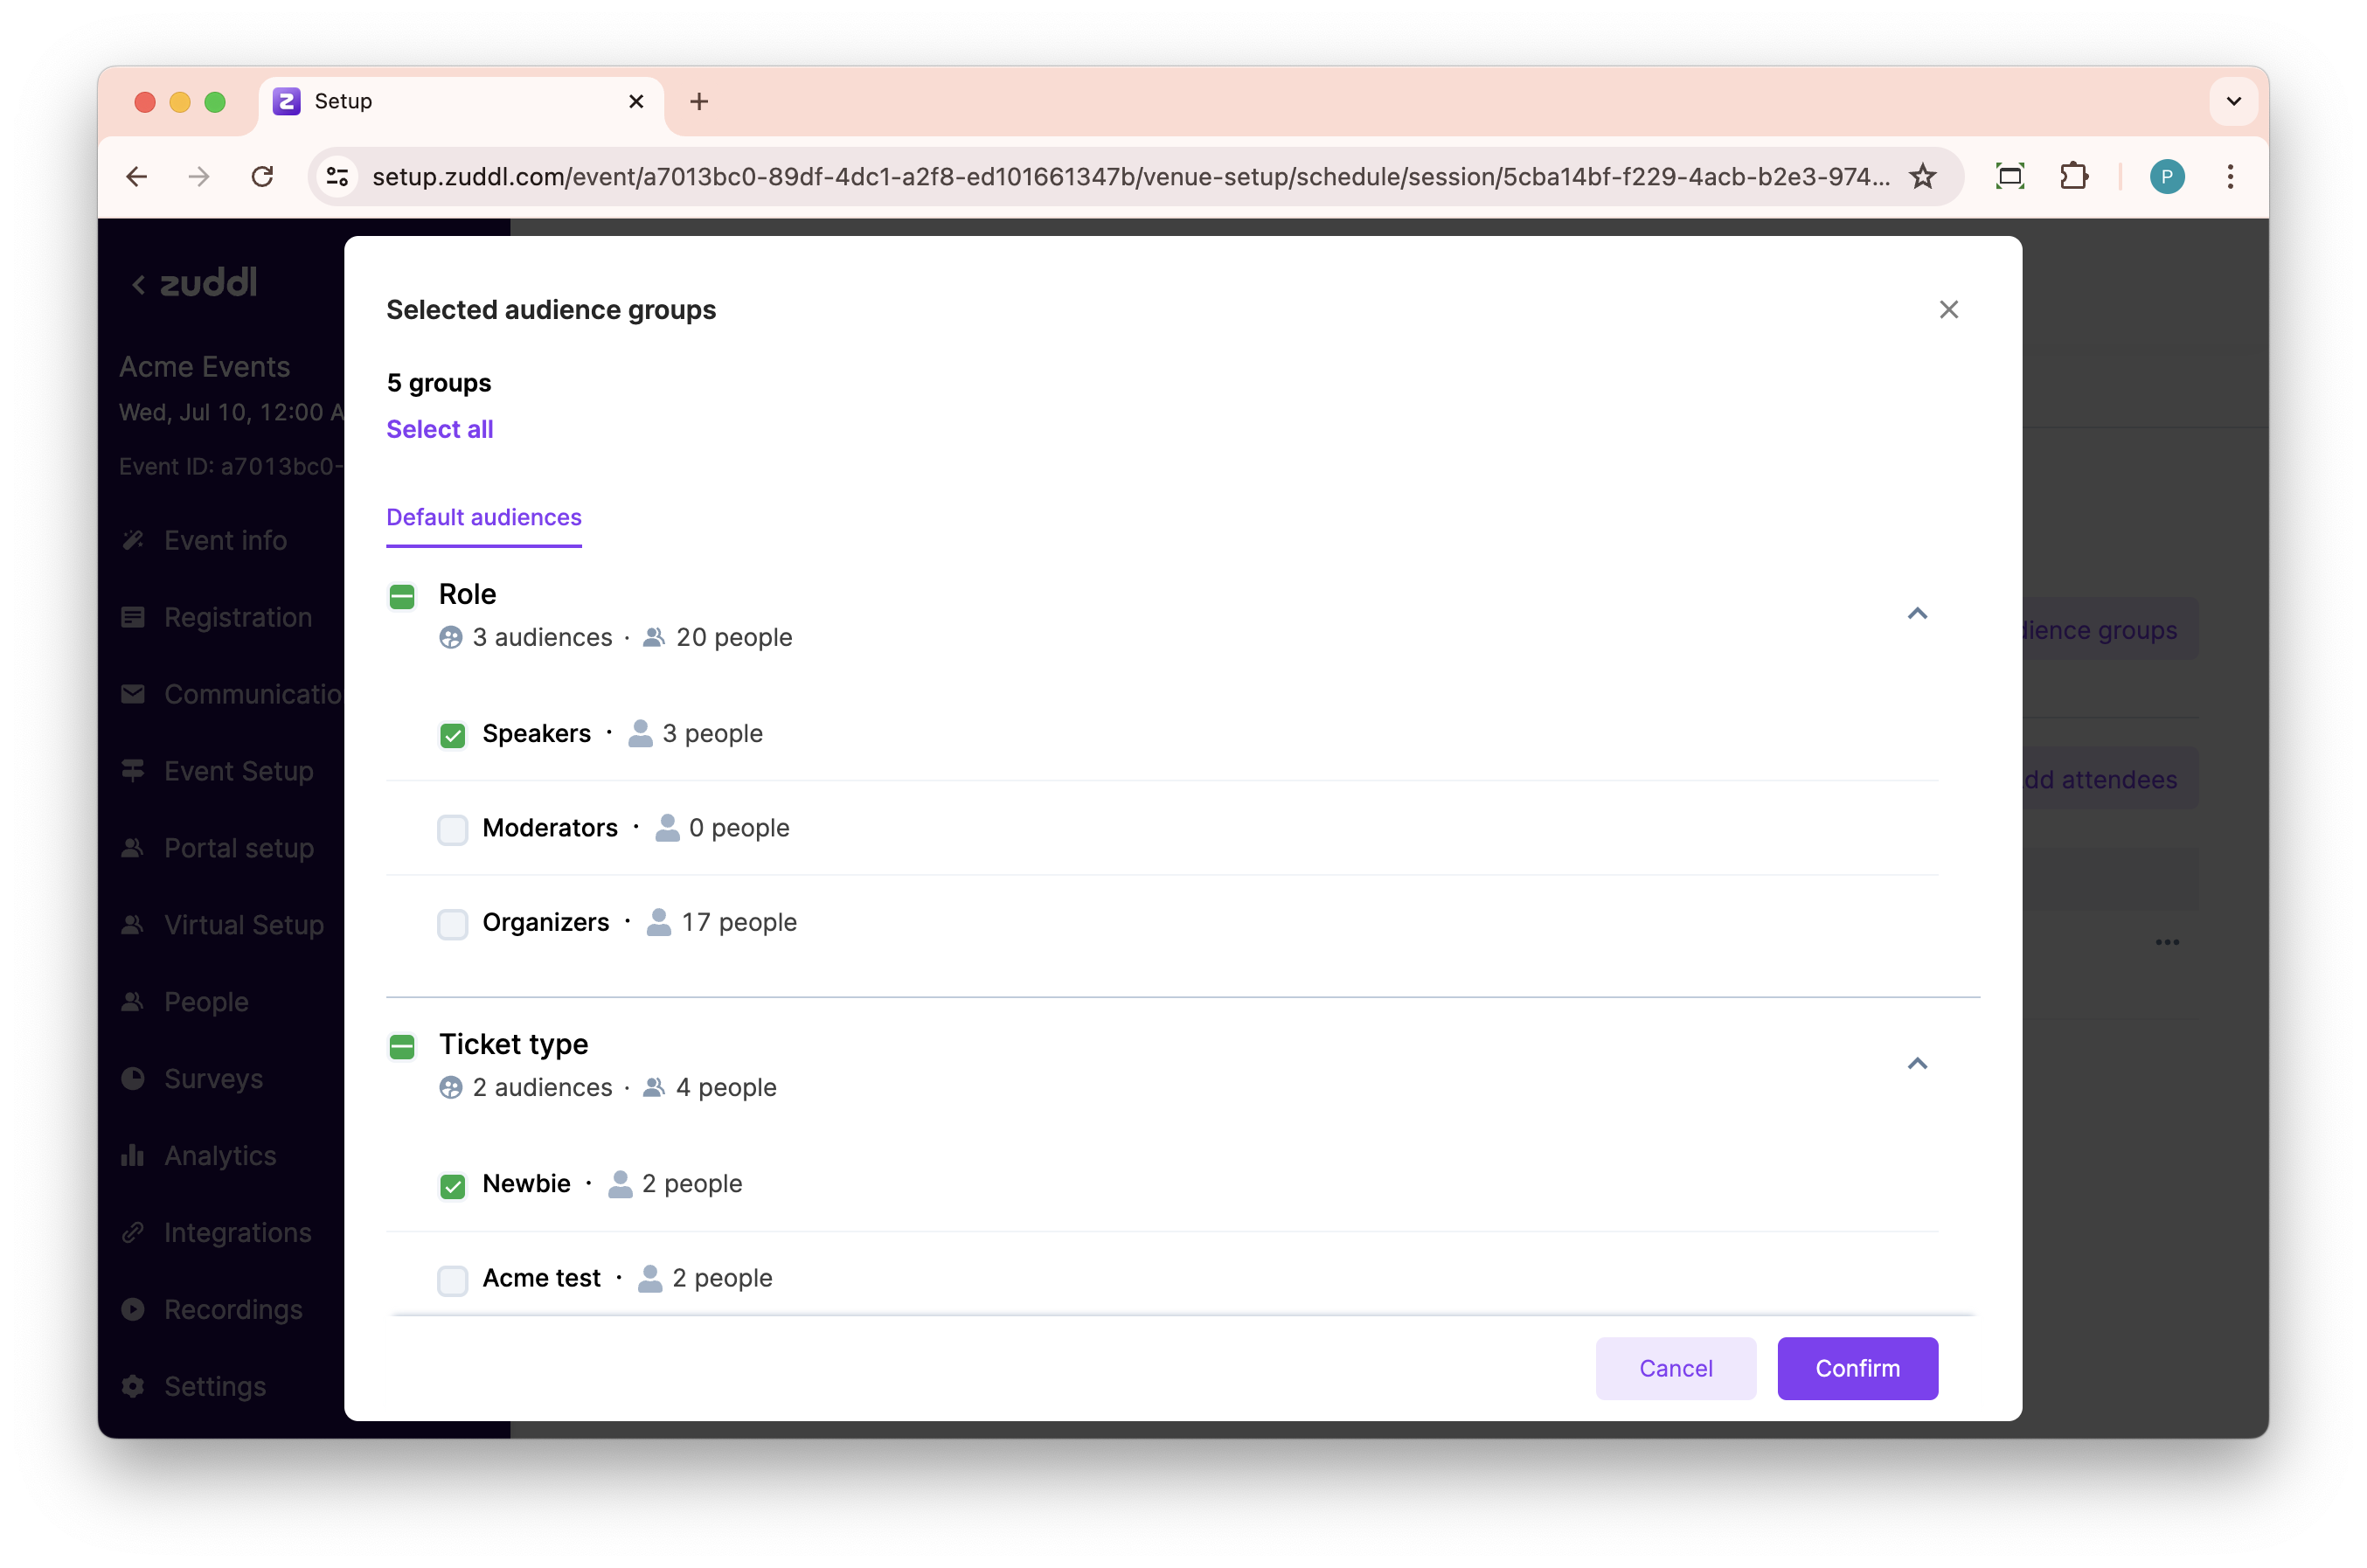
The selected audience groups along with the number people are shown under the Audience groups section
You can also search for an attendee using Filters based on audience groups and Ticket type.
To add event tags to the session, under Event tags click Select tags. Assign tags to this session by clicking them (highlighted with a green tick).
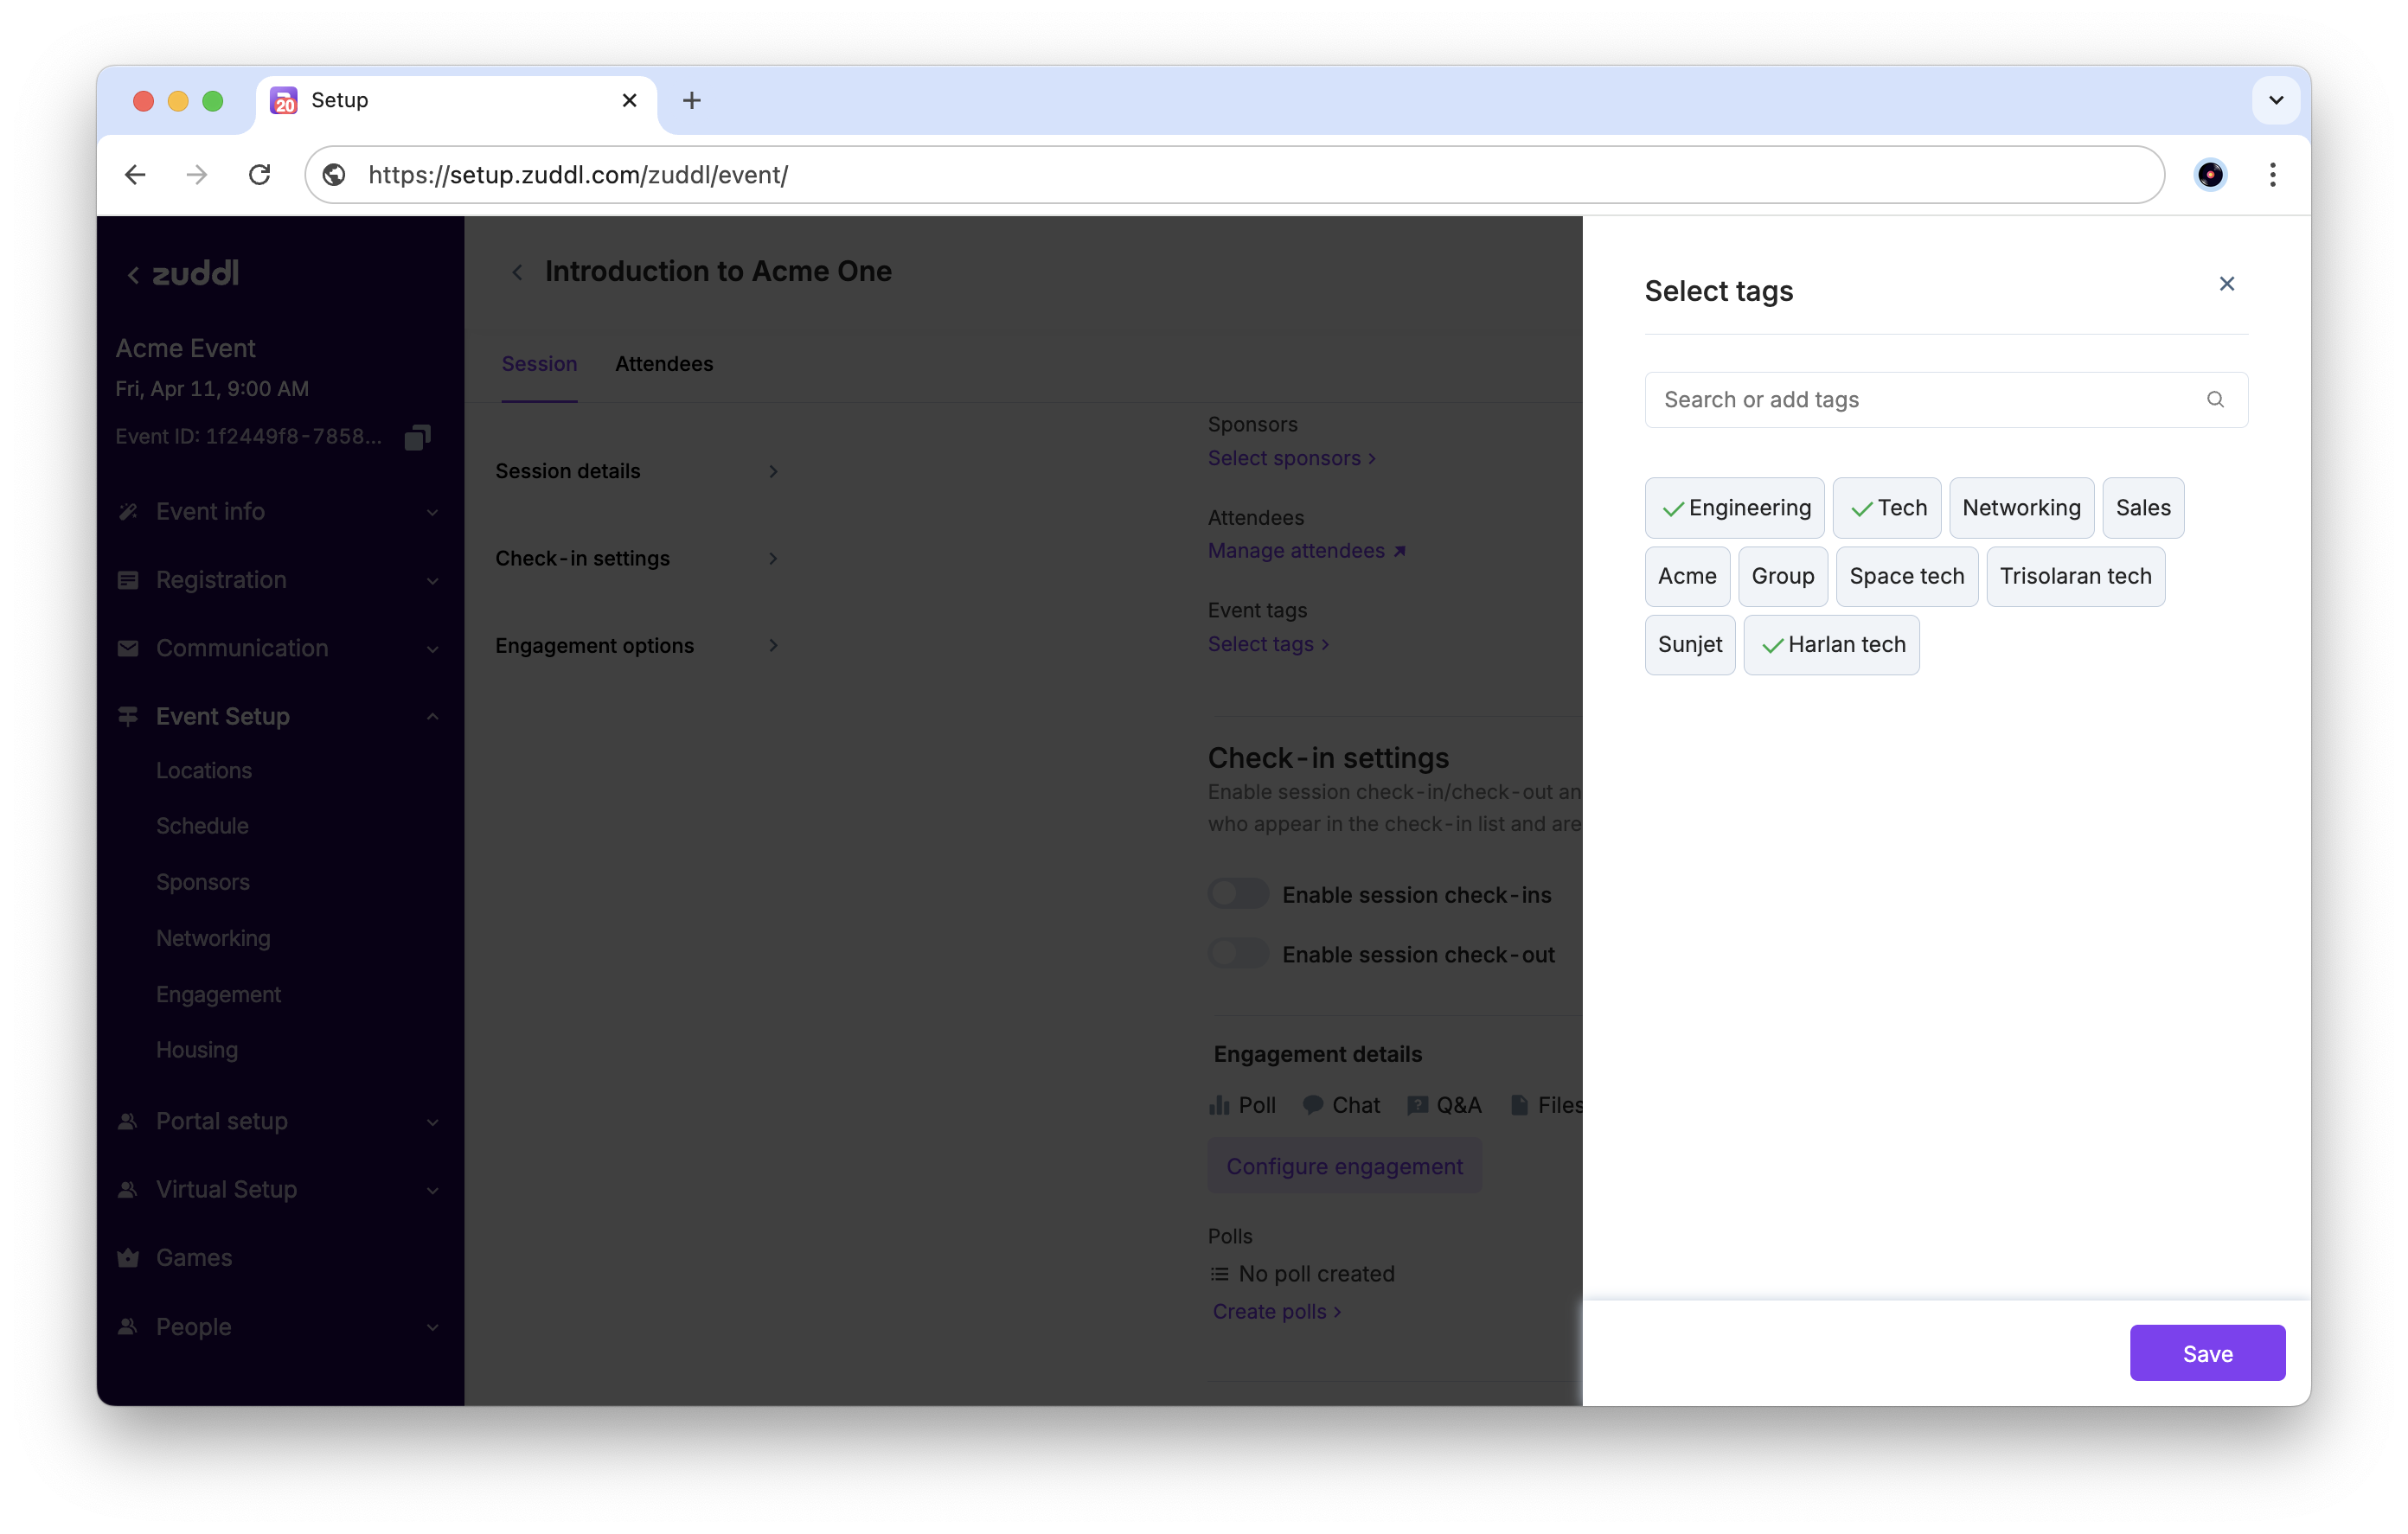
To add a new event tag, enter the tag text in the search bar and click +Add tag.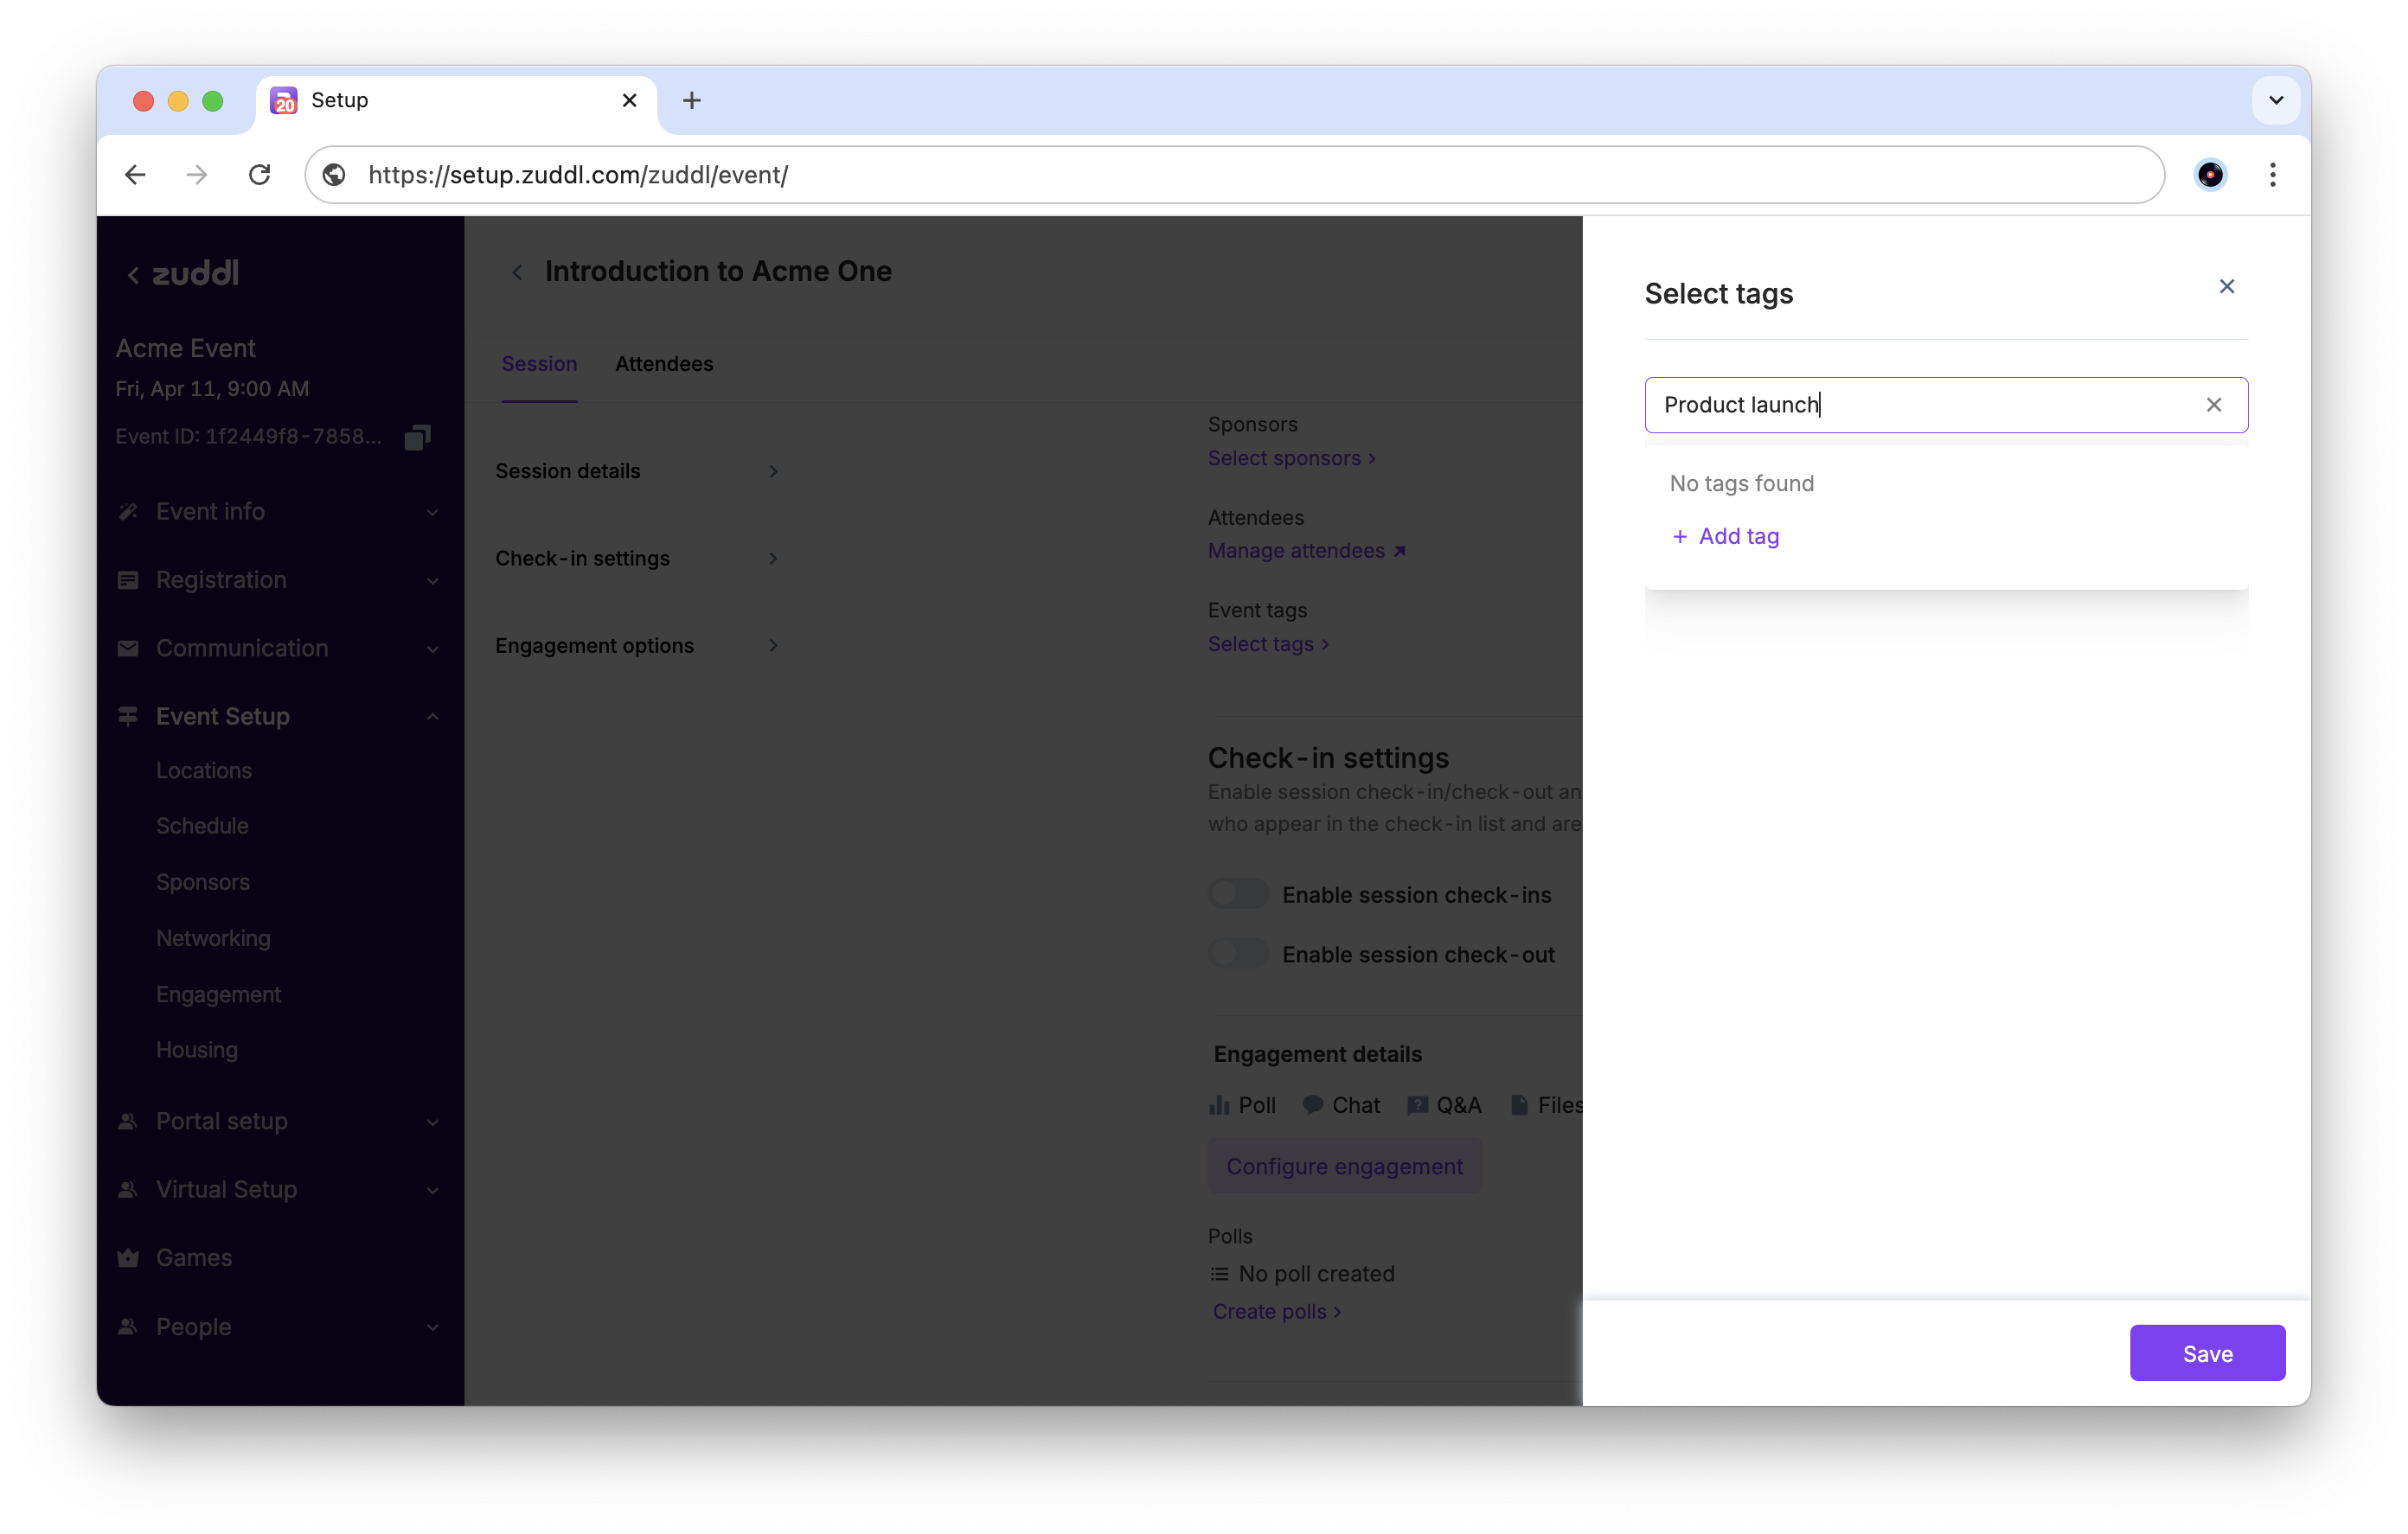
Click Save to add these tags to your session.
Check-in settings
You can enable session check-in/check-out and manage check-in preferences by choosing who appear in the check-in list and are permitted to check in to sessions.
Toggle on Enable session check-ins and select who can check-in
Only people registered for the session: This includes people who have paid, scheduled the session from the mobile app or web, or have been registered to a session by the organizer.
Everyone with access to this session: This includes people with access to this session granted via access control and anyone that has been registered for the session.
Everyone attending the event: This includes everyone attending the event
Toggle on Enable session check-out for session attendees to check-out from the session.
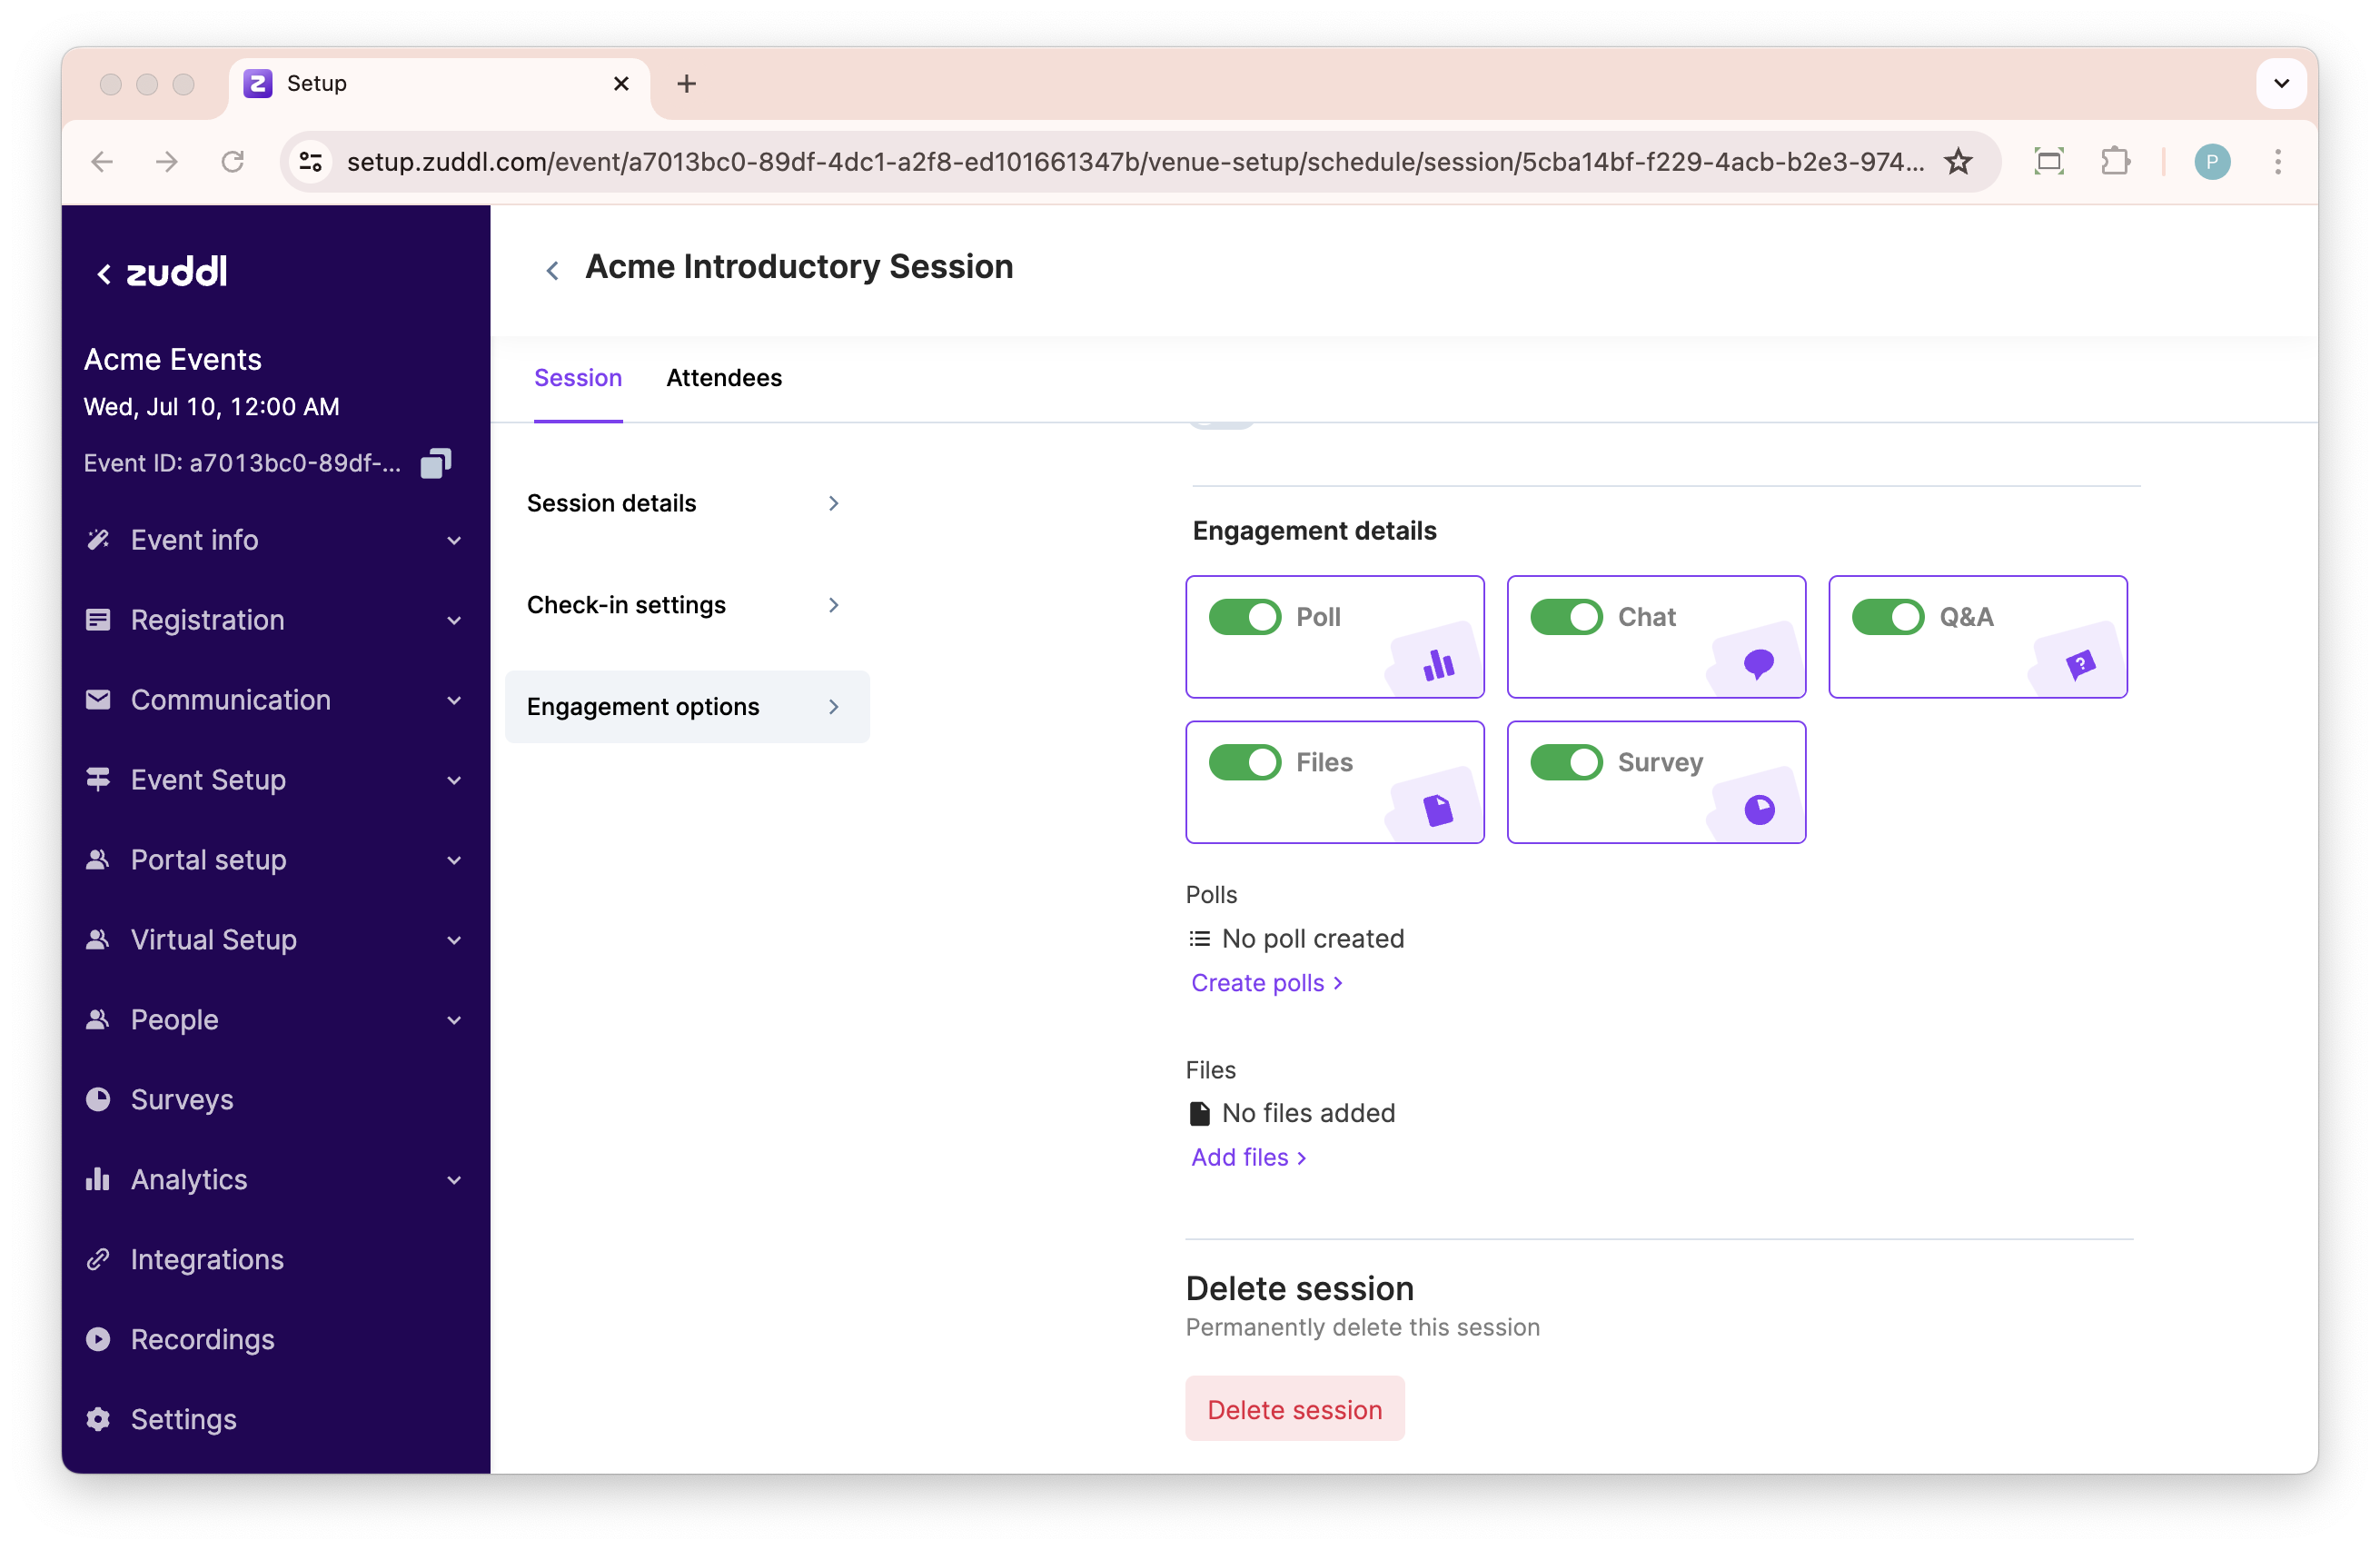
Engagement details
You can toggle on the following engagement option for the session
Poll: You can take polls for your session attendees. You should create a poll using Create polls link under Polls.
Chat: This enable chat option during the session
Q&A: This allows attendees to ask questions during a session under the Q&A tab.
Files: This allows you to add pre-loaded files for your session speaker which can be used during the session. You should add files by clicking the Add files link under Files.
Survey: This allows to create and publish a survey for your session attendees
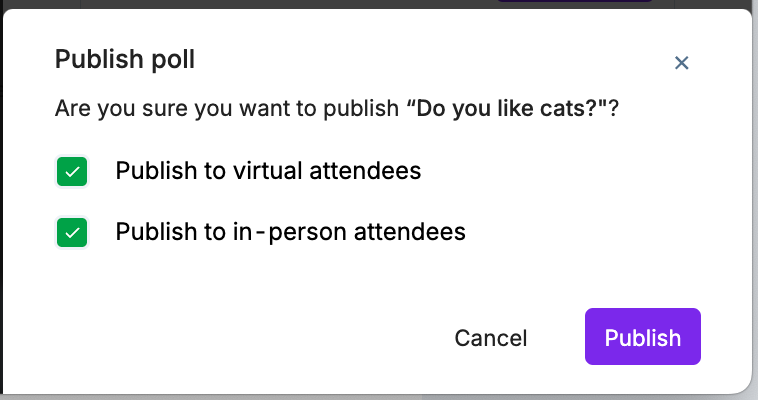
For hybrid events, if the merge engagement is toggled off, you are shown the following prompt when publishing a poll.
Delete a session
You can click the Delete session button to delete it from your schedule.
Search for a session
Go to Venue Setup > Schedule.
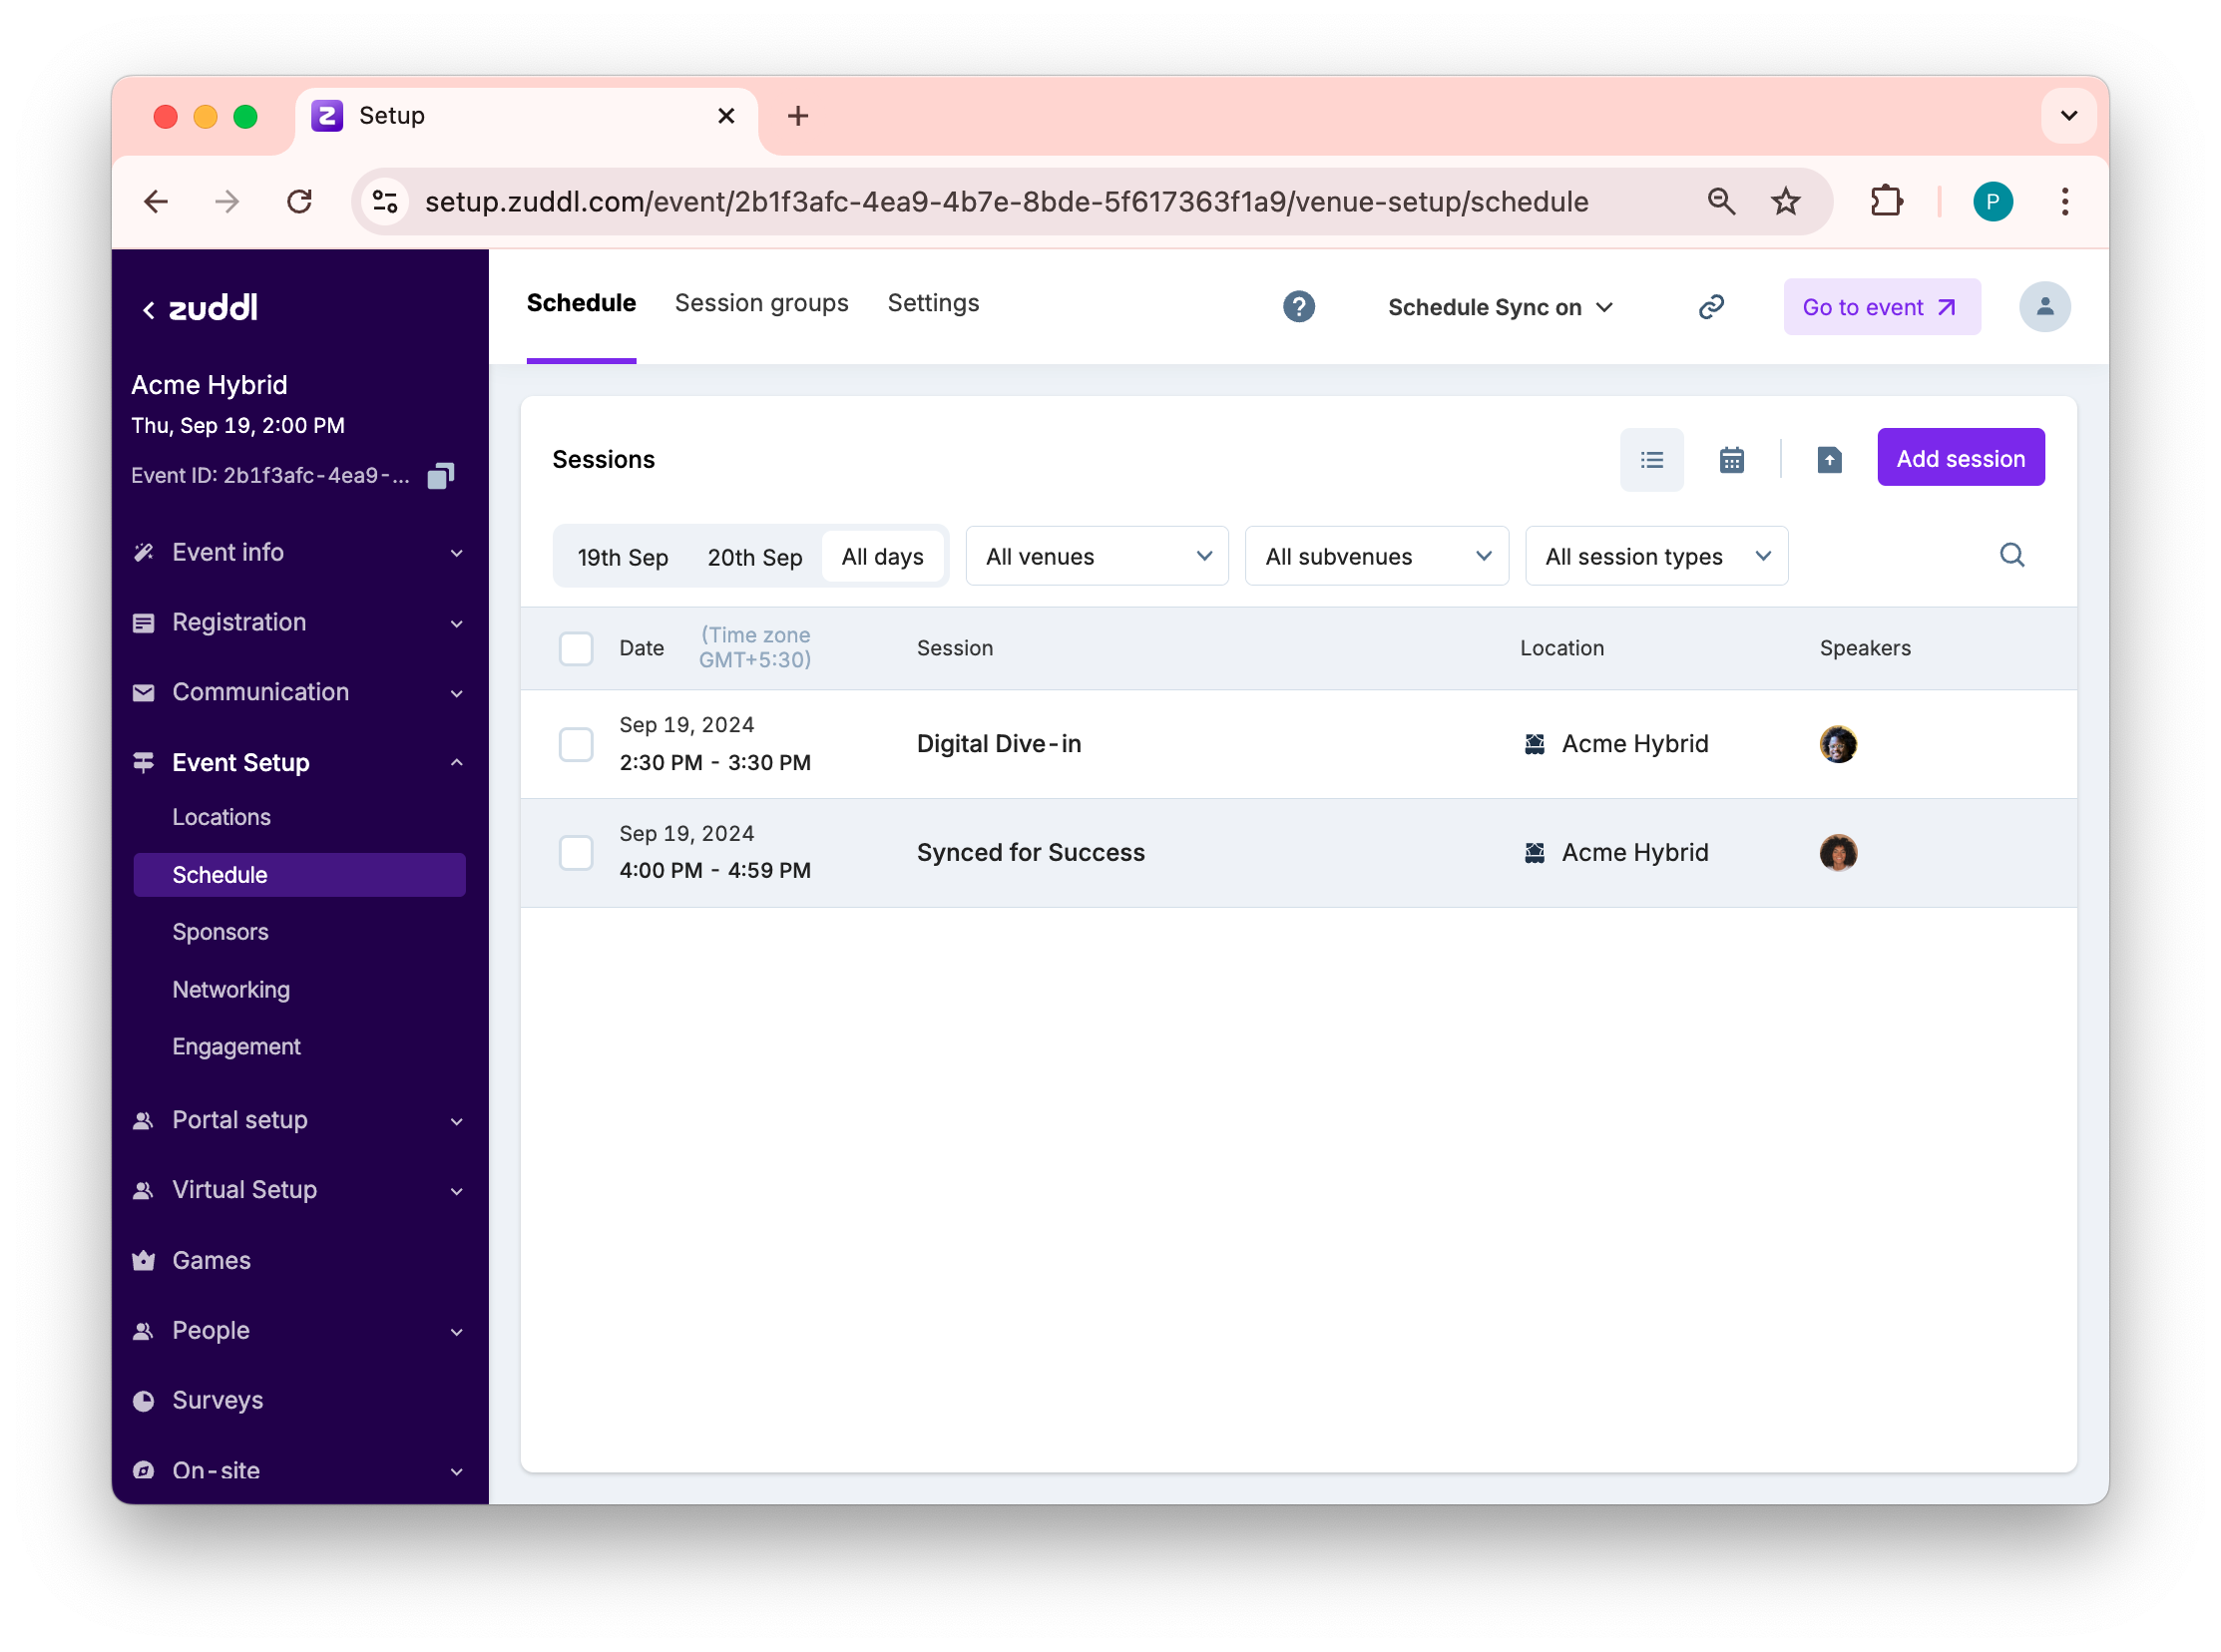
On the session listing page, click on the search icon and enter the session or speaker name to search for a particular session. You can also filter the list using the Select Venue and Select Subvenue dropdown.
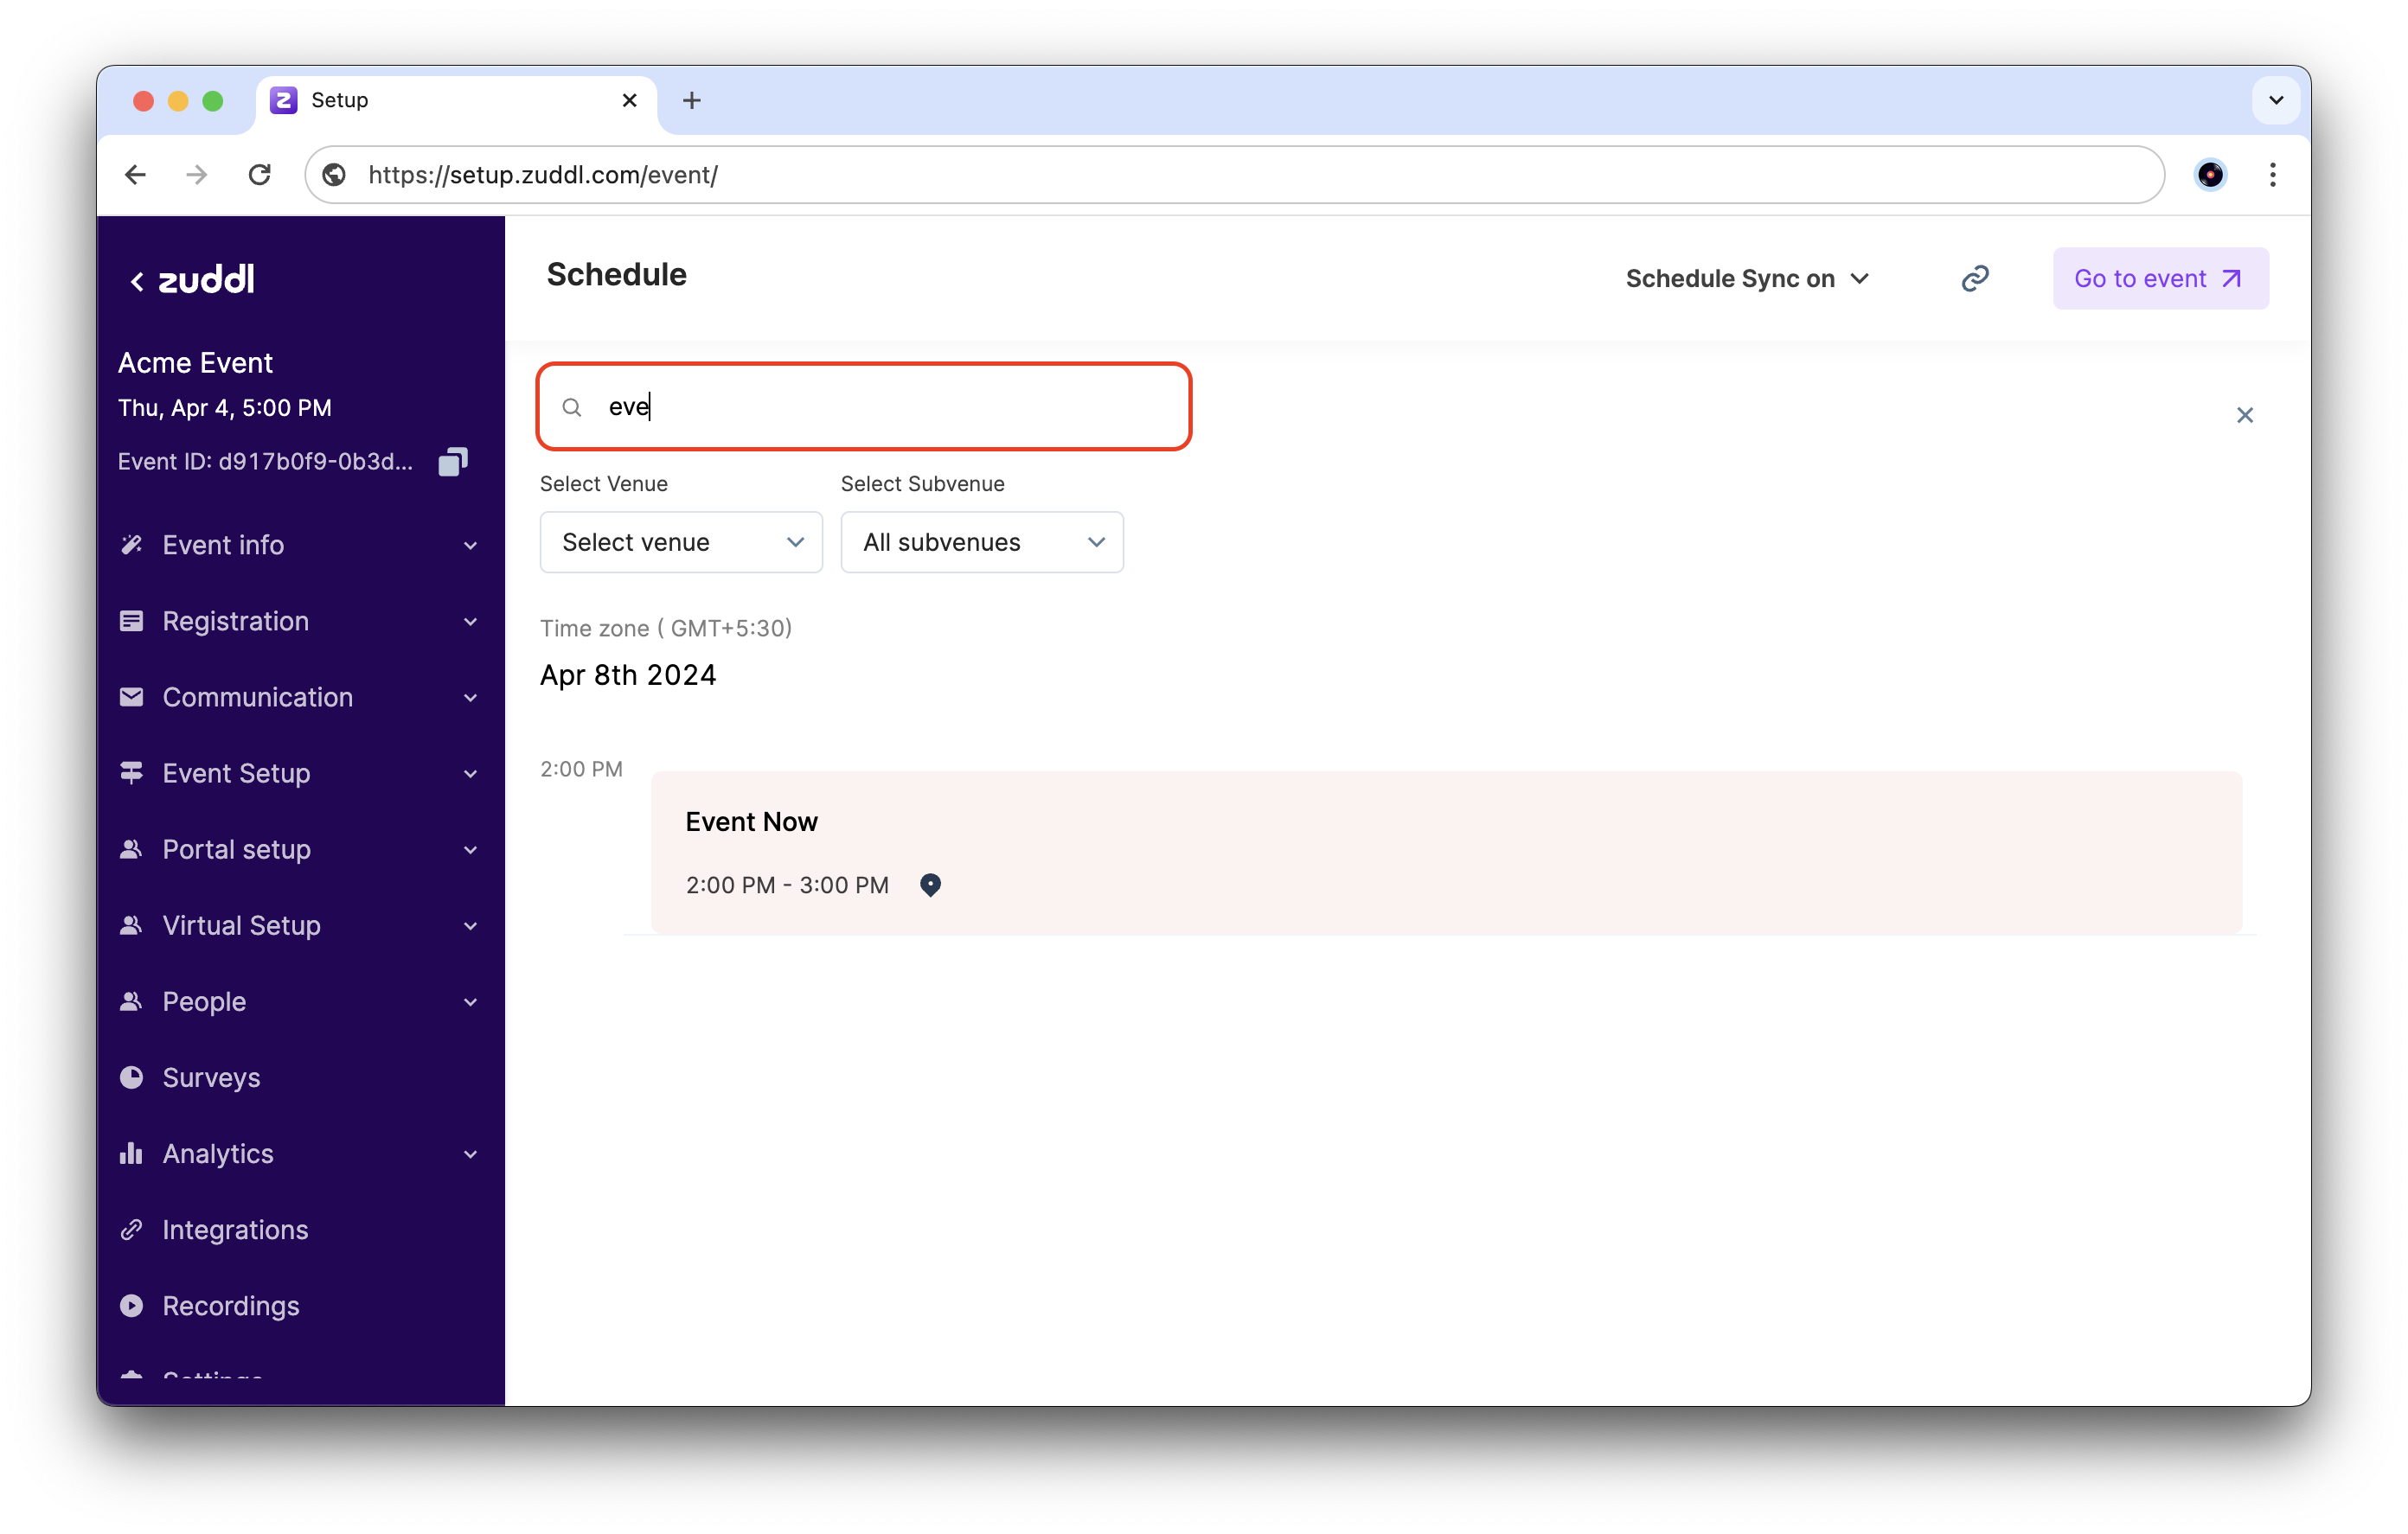
For a multi-day event, you can also filter by session date using the date tabs. The session date options are listed based on the event start and end date specified at the time of event creation.
Viewing the session list
You can switch between list view or calendar timeline view by clicking the respective icons.
List view: Choose the list view to all session added for the event in a list.
Calendar view: Chose the calendar timeline view for date-wise view of the sessions.

The table shows the different views side-by-side.
Calendar timeline viewList view | |
 |  |
You can also drag and reorder parallel sessions (sessions starting at the same time) on the list view. The updated session order will be reflected across all display areas, including session groups, virtual and app schedules, and widgets.
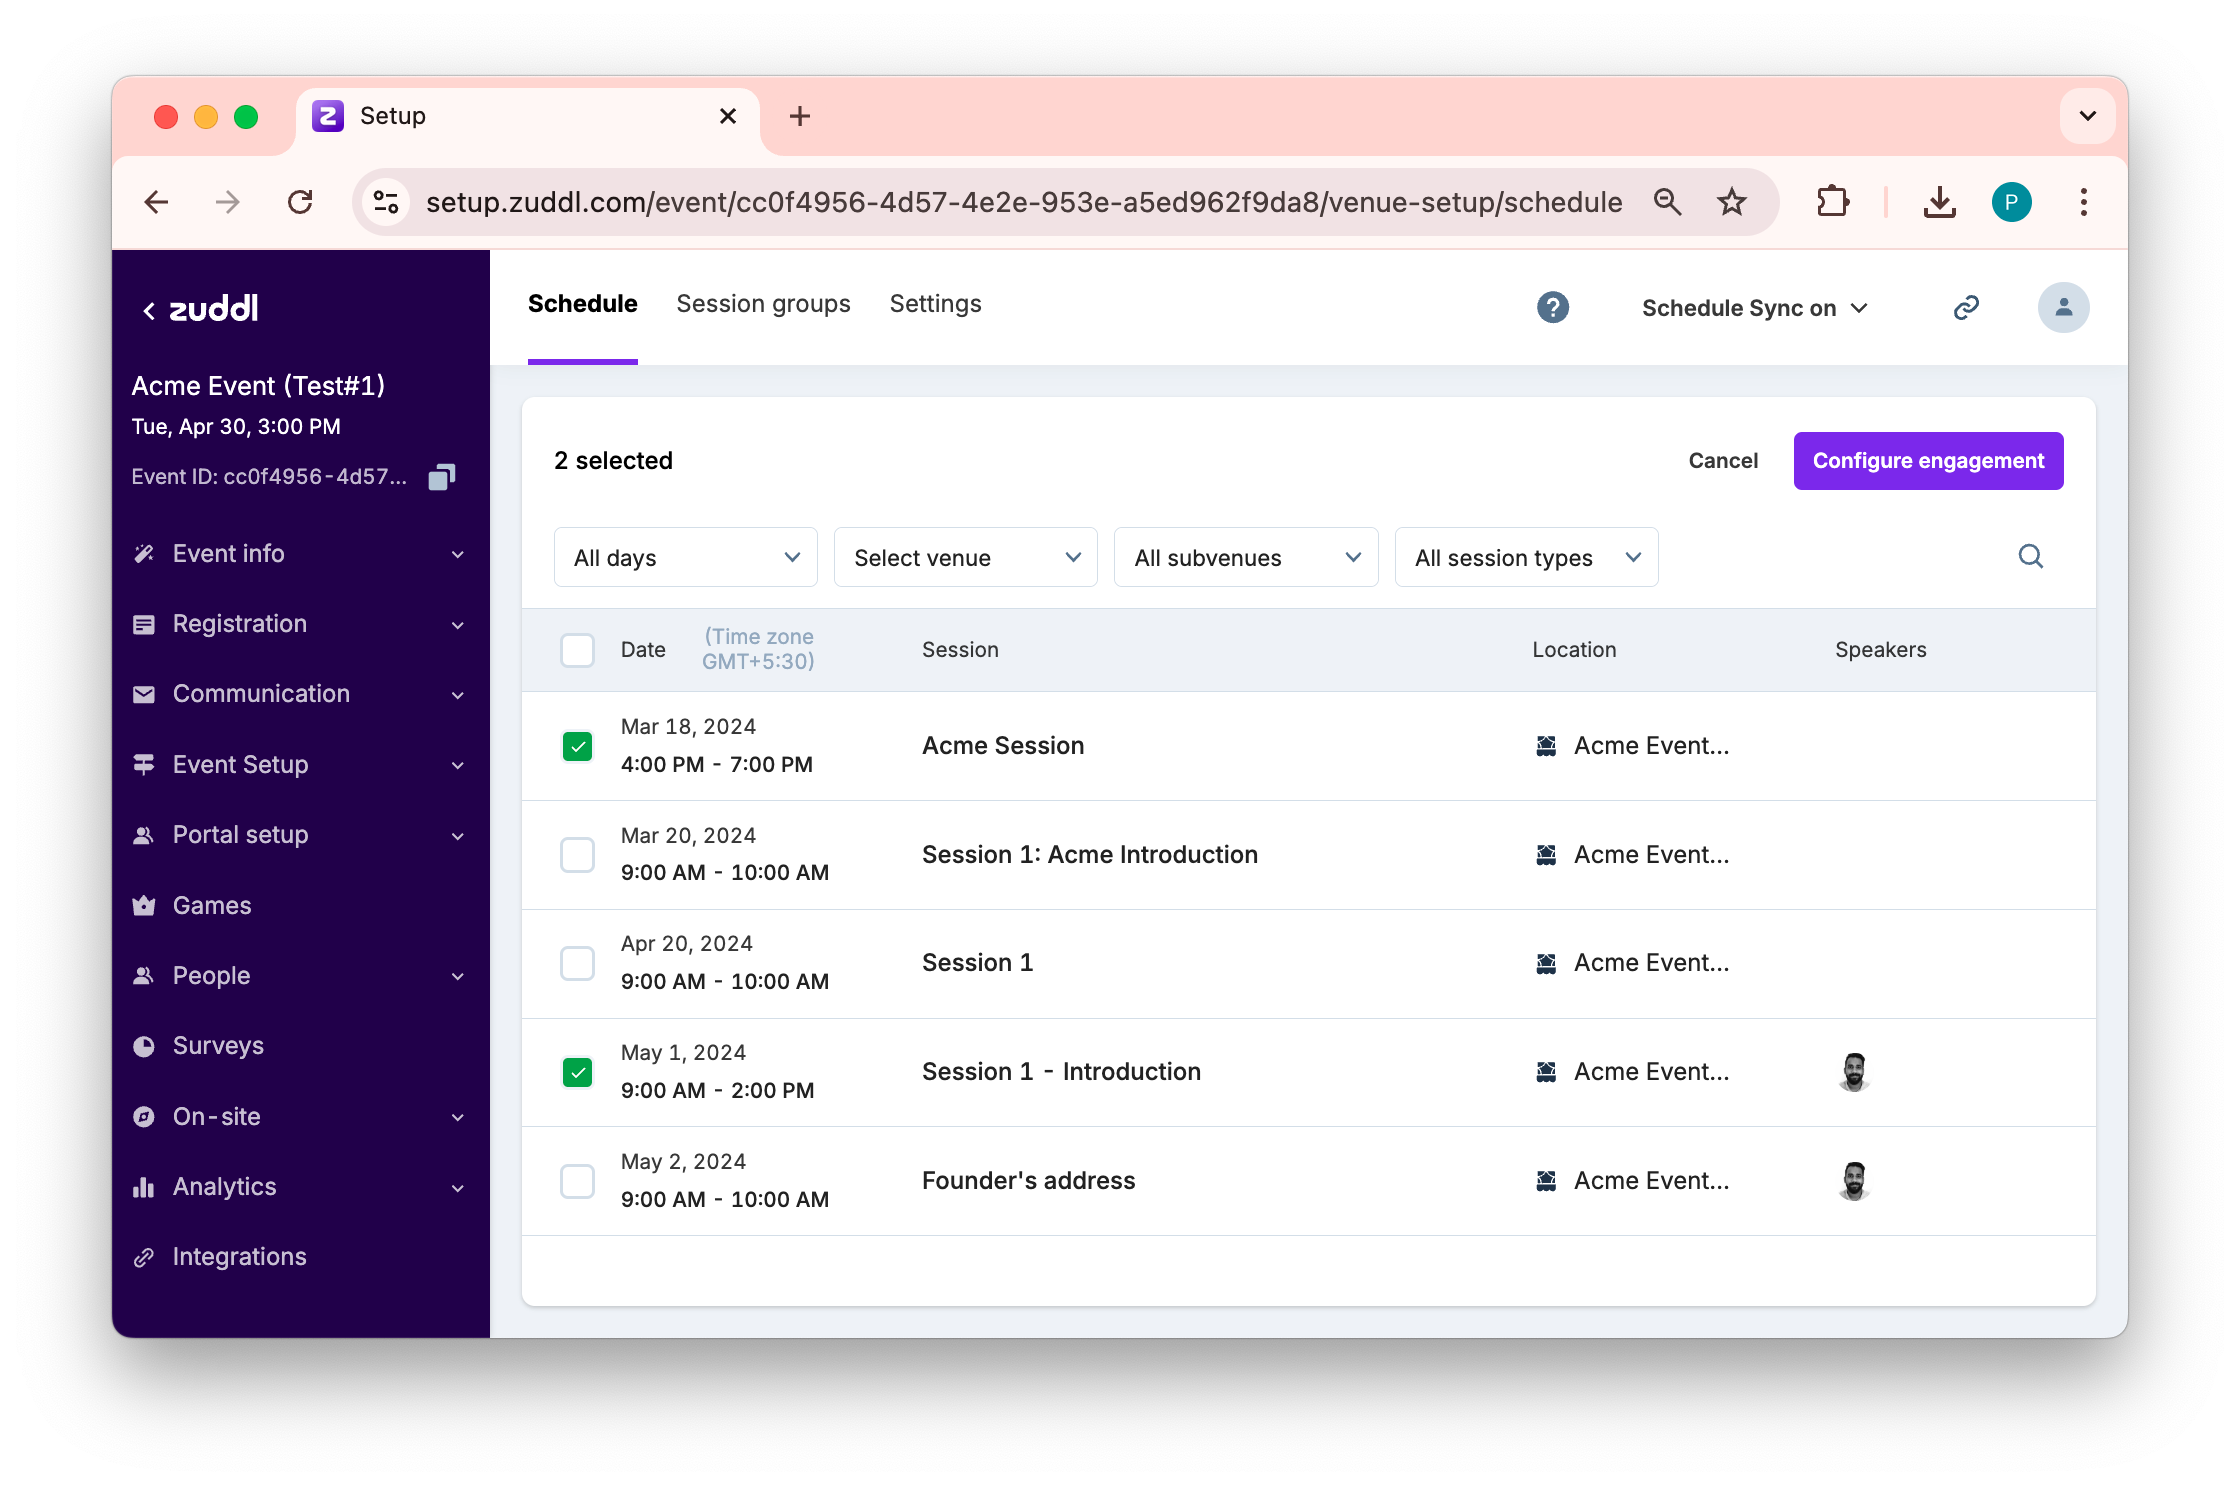
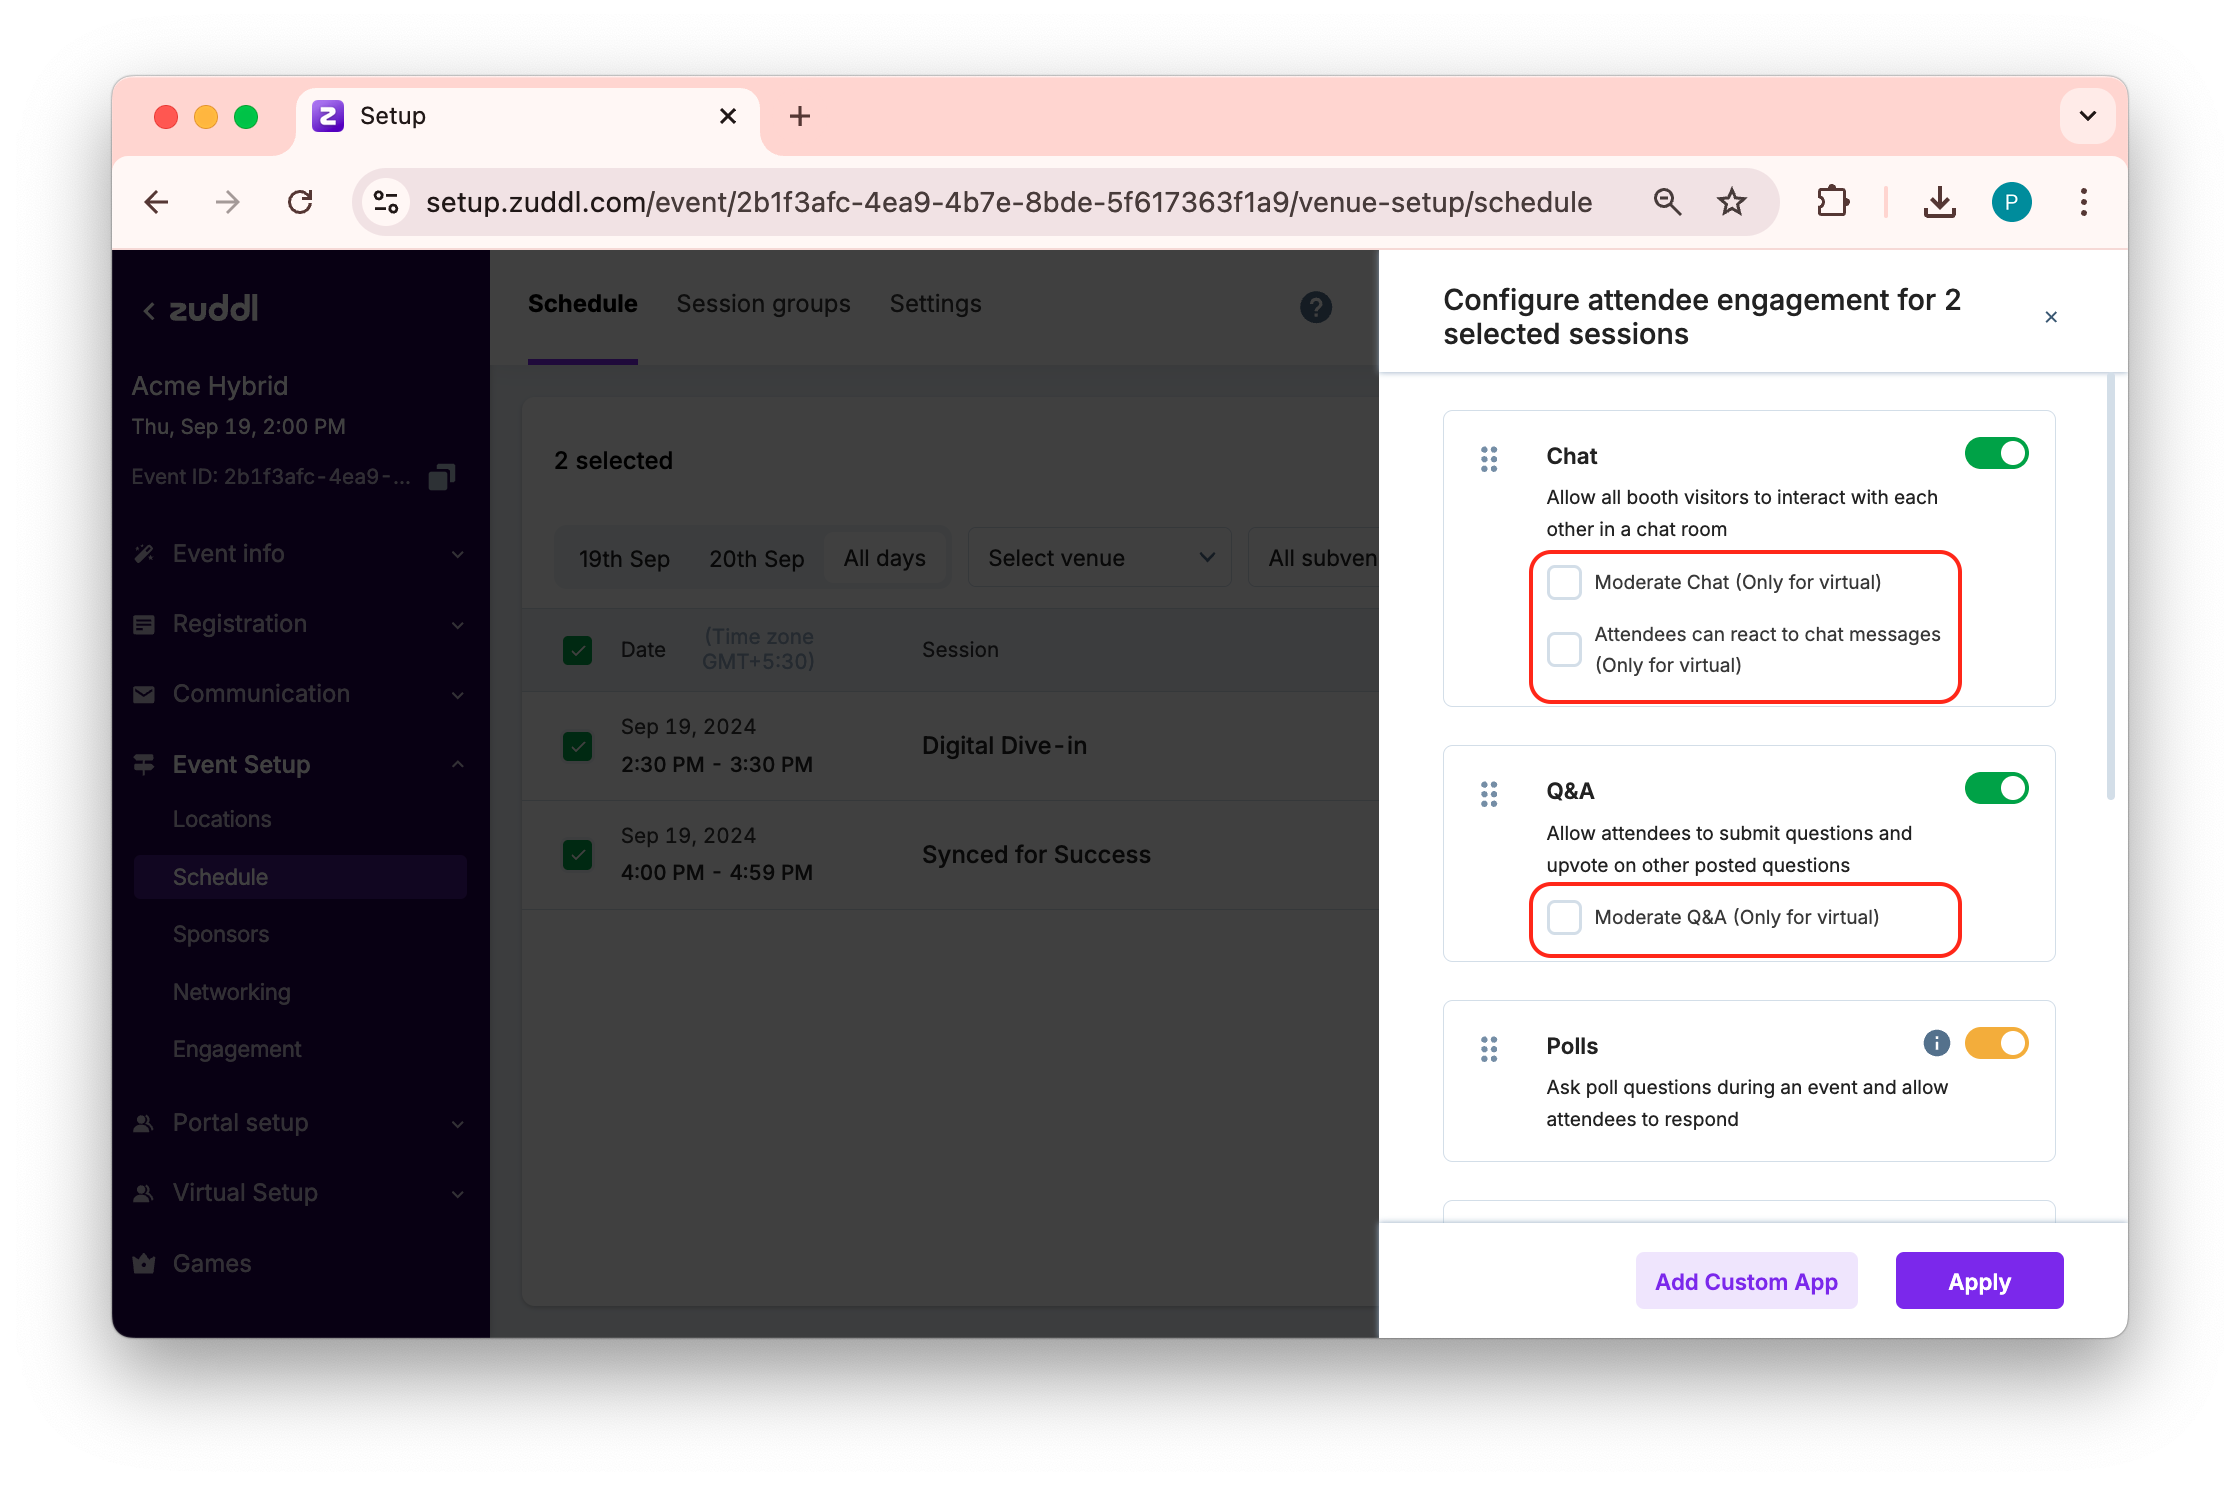
Configuring engagement multiple session
You can configure engagements for multiple session at once. To do so
Select the checkbox for the required sessions
Click the Configure engagement button.
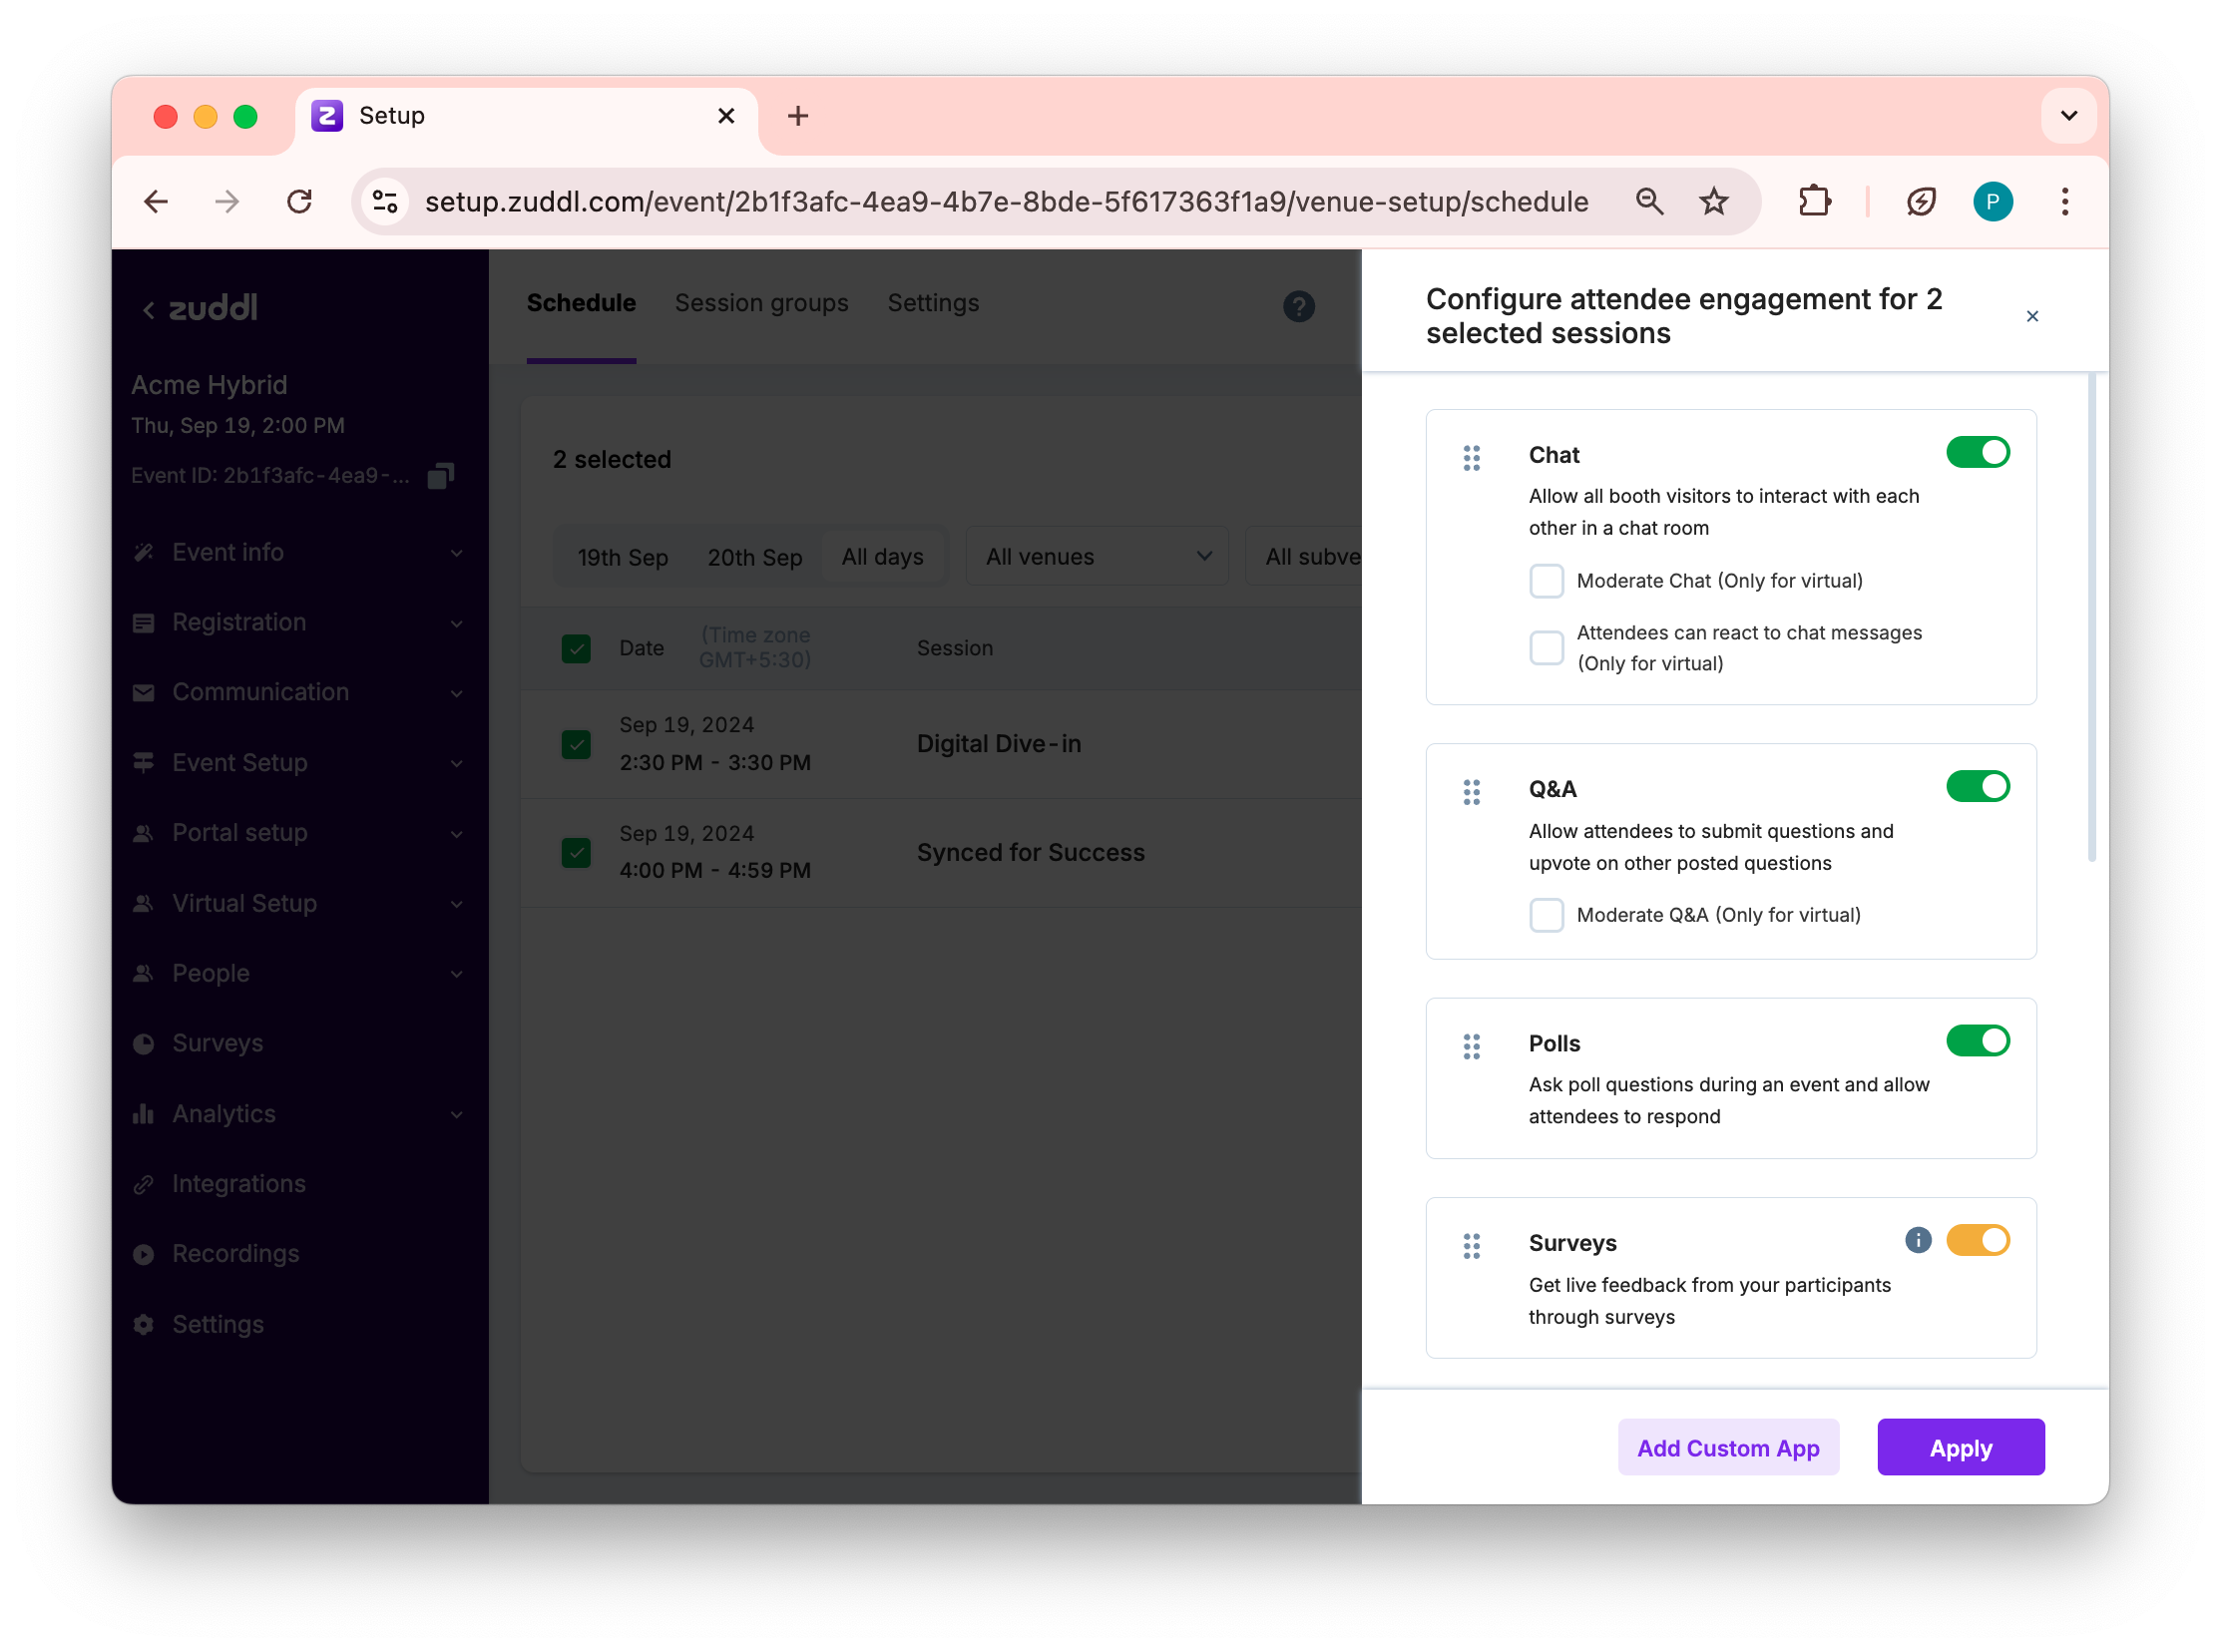
On the slide-out engagement screen, select the required engagement common for a session.
Click Apply.
If you had previously configured an engagement for one session, say toggled on "Chat" for session 1 and the same is toggled off for another session, say session 2. When you bulk configure engagements, these two sessions, the conflicting settings are shown in amber.
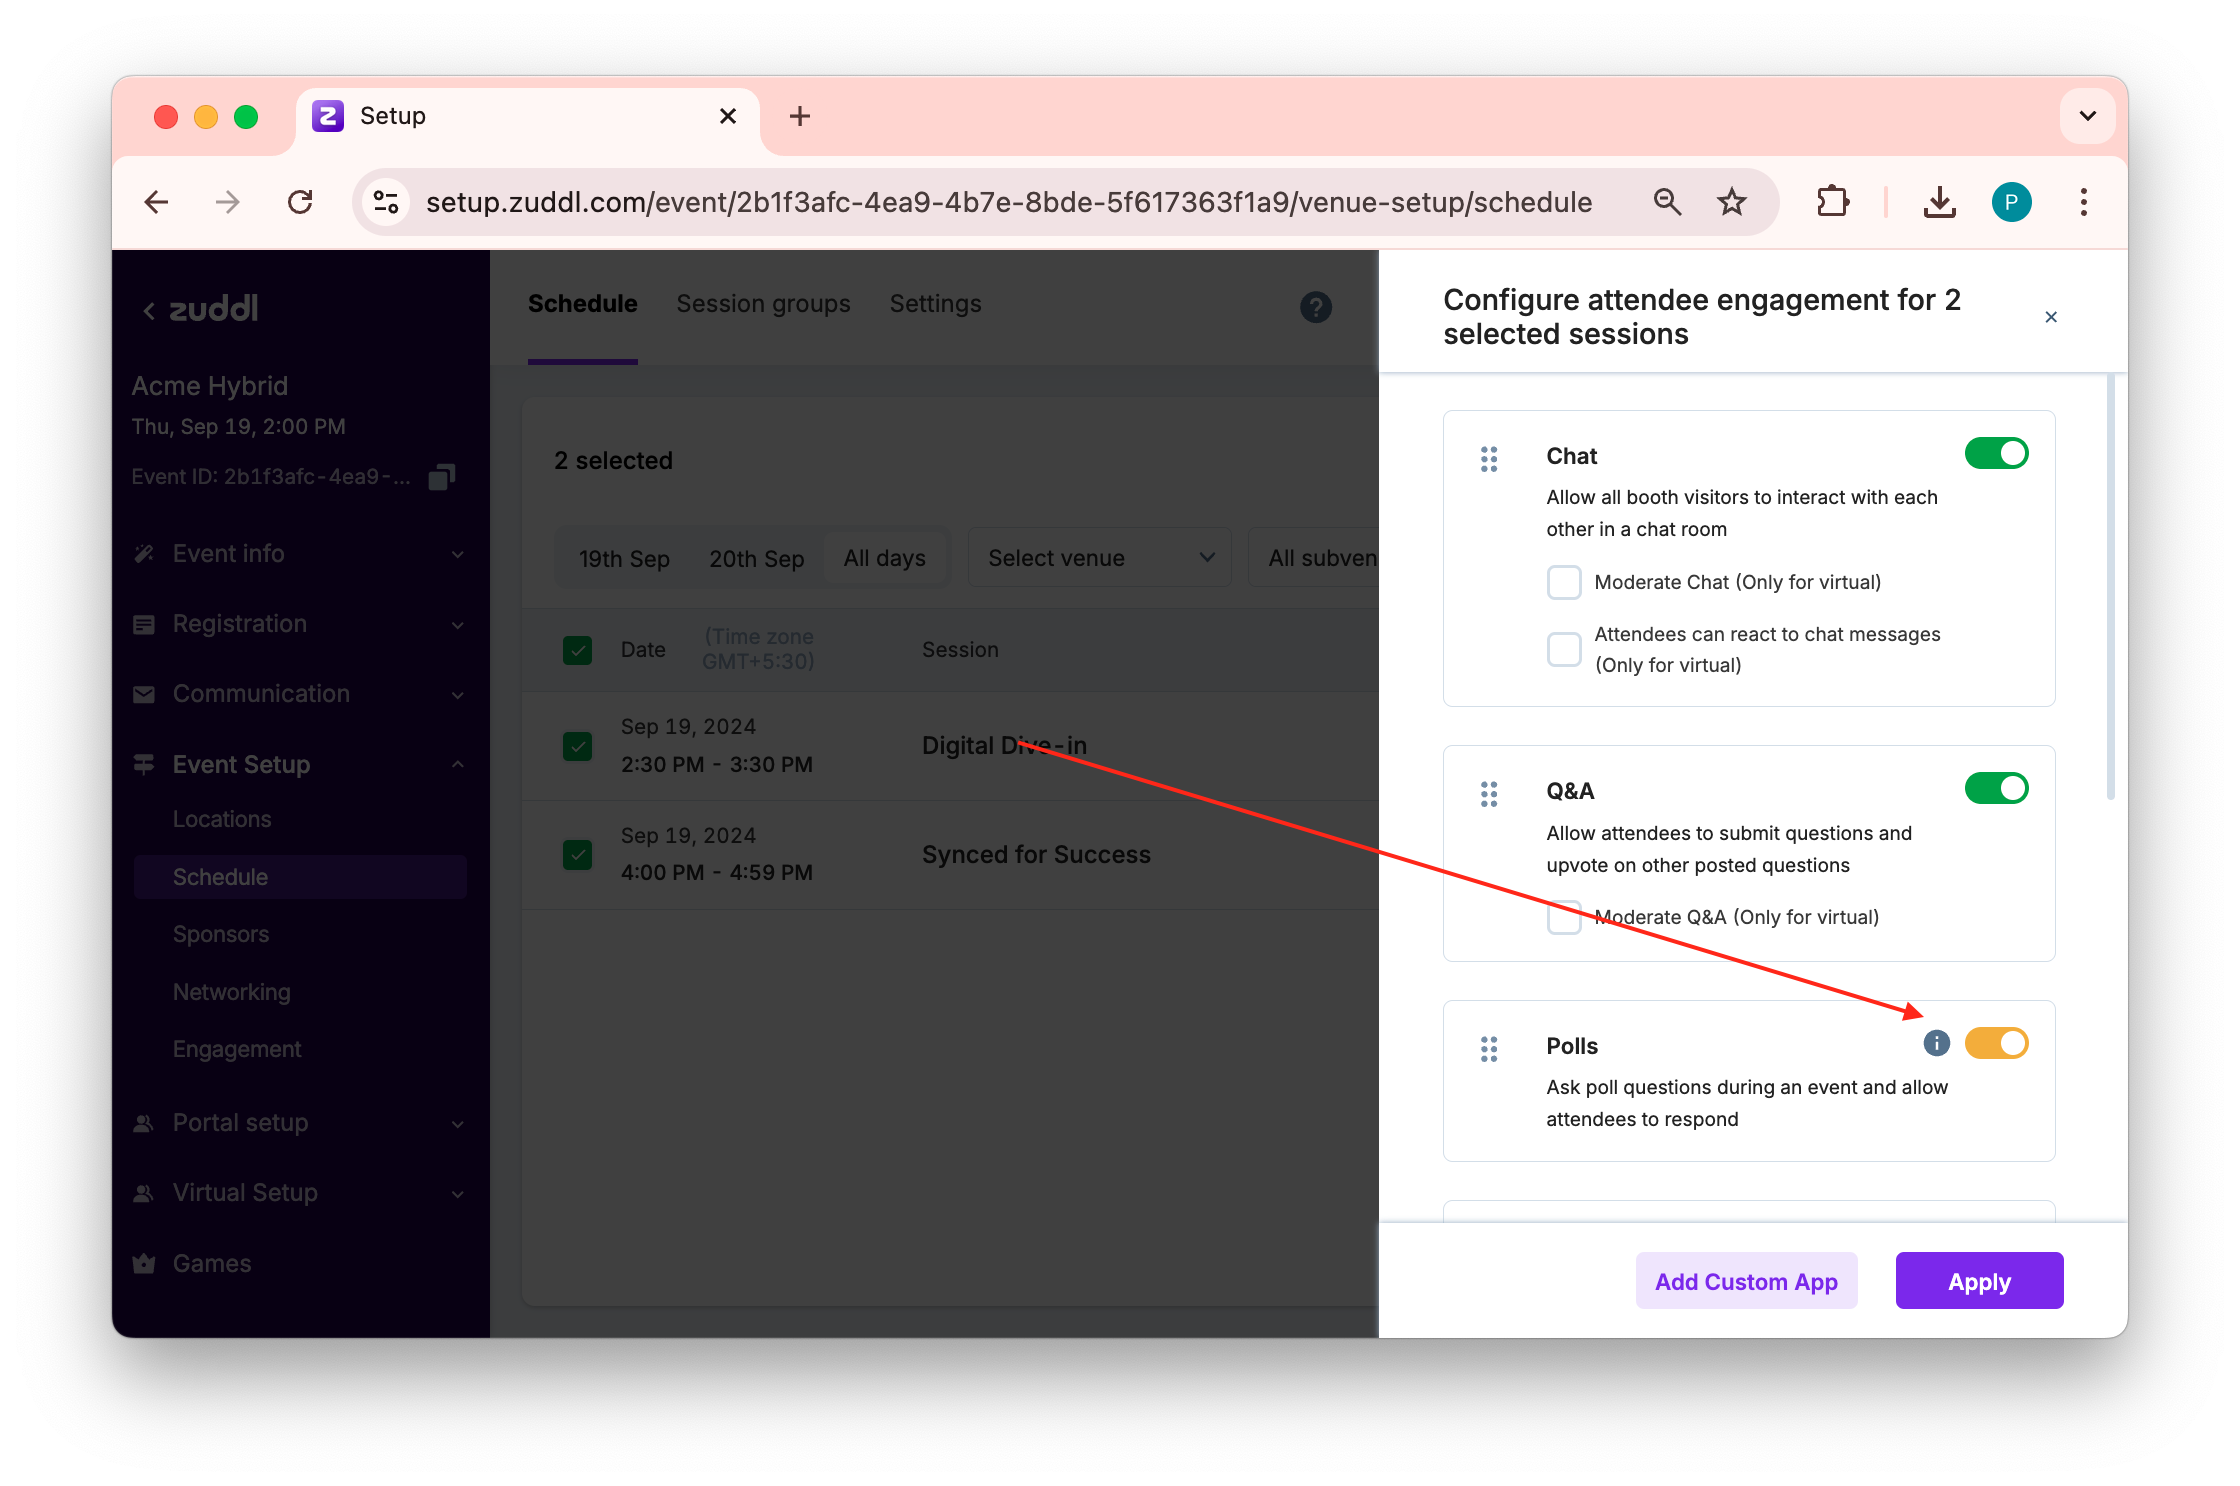
Features that are available only for virtual session is shown with a label.
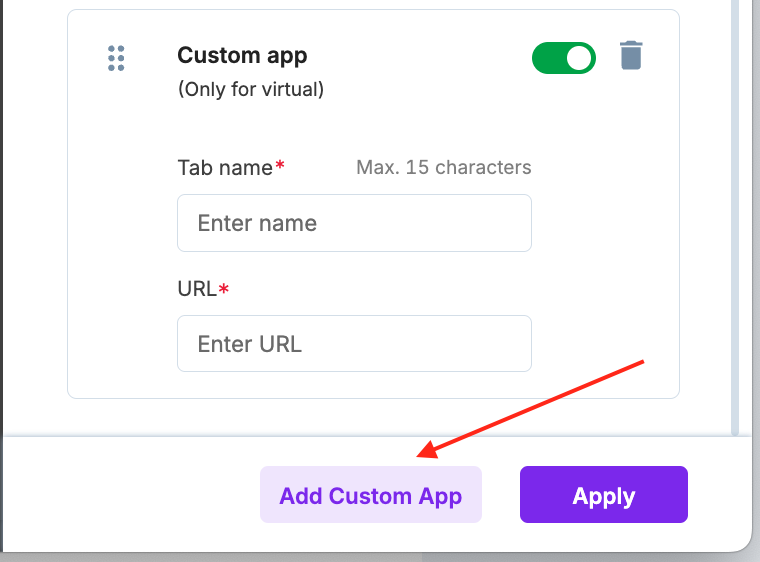
You can also click Add custom app button to add iframe line for a custom app for session engagement.